Hello and welcome to this tutorial series, my name is Henry and I will be taking you through the various aspect of creating a simple blog system using Laravel web framework. In lesson IX, we completed working on our admin dashboard. In this lesson, we are going to work on our landing page.
When you spin up your development server and navigate to http://127.0.0.1:8000/ you get the following screen.

We need to display post created in our admin portal to this page.
Getting Started
We are going to create a new controller named PostController.php file. To create our controller run the following command on your terminal:
php artisan make:controller PostController
Here is the output of my terminal:

Open PostController and make sure it has the following code.
<?php

namespace App\Http\Controllers;

use App\Blog;
use Illuminate\Http\Request;

class PostController extends Controller
{
    public function index()
    {
        $latest_post = Blog::orderBy('id', 'DESC')->take(5)->get();
        $posts = Blog::orderBy('id', 'DESC')->paginate(3);

        $data = [
            'posts' => $posts,
            'latest_posts' => $latest_post
        ];
        return view('welcome', $data);
    }
}
let’s understand the code:
- Line 10 to 20 – we create a function called index.
- Line 12 – we take latest 5 post which we will display in the side navbar
- Line 13 – we get the posts but we create a pagination of 5 post per page. Learn more about Laravel pagination.
- Line 15 to 18 – we create a variable named data and we pass an array of query set.
- Line 19 – we pass our data to our welcome.blade.php file.
The next step is to update our welcome.blade.php file. Make sure it has the following code:
<!DOCTYPE html>
<html lang="{{ str_replace('_', '-', app()->getLocale()) }}">
<head>
    <meta charset="utf-8">
    <meta name="viewport" content="width=device-width, initial-scale=1">

    <!-- CSRF Token -->
    <meta name="csrf-token" content="{{ csrf_token() }}">

    <title>{{ config('app.name', 'Laravel') }}</title>

    <!-- Scripts -->
    <script src="{{ asset('js/app.js') }}" defer></script>

    <!-- Fonts -->
    <link rel="dns-prefetch" href="//fonts.gstatic.com">
    <link href="https://fonts.googleapis.com/css?family=Nunito" rel="stylesheet" type="text/css">
    <link rel="stylesheet" href="https://use.fontawesome.com/releases/v5.7.2/css/all.css" integrity="sha384-fnmOCqbTlWIlj8LyTjo7mOUStjsKC4pOpQbqyi7RrhN7udi9RwhKkMHpvLbHG9Sr" crossorigin="anonymous">

    <!-- Styles -->
    <link href="{{ asset('css/app.css') }}" rel="stylesheet">
</head>
<body>
<div id="">
    <nav class="navbar navbar-light bg-success justify-content-between">
        <a class="navbar-brand" style="color: white">Hlab</a>
        <form class="form-inline">
            <input class="form-control mr-sm-2" type="search" placeholder="Search" aria-label="Search">
            <button class="btn btn-outline-success my-2 my-sm-0" type="submit" style="color: white">Search</button>
        </form>
    </nav>
    <main class="py-4">
        <div class="row container-fluid">

            {{-- main content area--}}
            <div class="col-md-8">
                @foreach($posts as $post)
                    <div class="card mb-3">
                        @if($post->image)
                            <img class="card-img-top" src="{{ asset('images/'.$post->image) }}" alt="{{ $post->title }}" style="height: 400px">
                        @endif
                        <div class="card-body">
                            <h5 class="card-title">{{ $post->title }}</h5>
                            <p class="card-text">
                                {{ $post->body }}
                            </p>
                            <p class="card-text"><small class="text-muted">{{ $post->writer->name }} </small></p>
                        </div>
                    </div>
                @endforeach
                    {{ $posts->links() }}
            </div>

            {{-- side navbar --}}
            <div class="col-md-4">
                <div class="card" style="width: 18rem;">
                    <div class="card-header">
                        Recent Posts
                    </div>
                    <ul class="list-group list-group-flush">
                        @foreach($latest_posts as $post)
                        <li class="list-group-item">
                            <a href="">{{ $post->title }}</a>
                        </li>
                        @endforeach
                    </ul>
                </div>
            </div>
        </div>
    </main>
</div>
</body>
</html>
Let’s understand the code:
- This is just a normal bootstrap4 code.
- Line 33 to 69 – we define a bootstrap row which we divide into two parts.
- Line 36 to 52 – we create our first section of 8 columns.
- Line 37 to 50 – we create a foreach loop, to loop through our posts.
- Line 40 – we display post image if the post has an image.
- Line 43 – we display our post title.
- Line 45 – we display the content of our post.
- Line 47 – we display the name of the author.
- Line 51 – after closing foreach loop, we display our paginations of posts.
- Line 55 to 68 – we define another section where our sidebar content will appear.
- Line 61 to 65 – we loop through our latest posts.
- Line 63 – we display the title of our post.
The next step is to update our web.php file, make sure it has the following code:
<?php

/*
|--------------------------------------------------------------------------
| Web Routes
|--------------------------------------------------------------------------
|
| Here is where you can register web routes for your application. These
| routes are loaded by the RouteServiceProvider within a group which
| contains the "web" middleware group. Now create something great!
|
*/

Route::get('/', 'PostController@index')->name('landing_page');

Auth::routes();

Route::get('/home', 'HomeController@index')->name('home');
Route::get('/registered/users', 'HomeController@getRegisteredUsers')->name('registered_users');
Route::get('/all/posts', 'HomeController@PostList')->name('all_posts');
Route::get('/create/post', 'HomeController@createPost')->name('create_post');
Route::post('/store/post', 'HomeController@storePost')->name('store_new_post');
Route::get('/edit/post/{post_id}', 'HomeController@editPost')->name('edit_post_form');
Route::post('/update/post/{post_id}', 'HomeController@updatePost')->name('update_post');
Route::post('/delete/post/{post_id}', 'HomeController@deletePost')->name('delete_post');
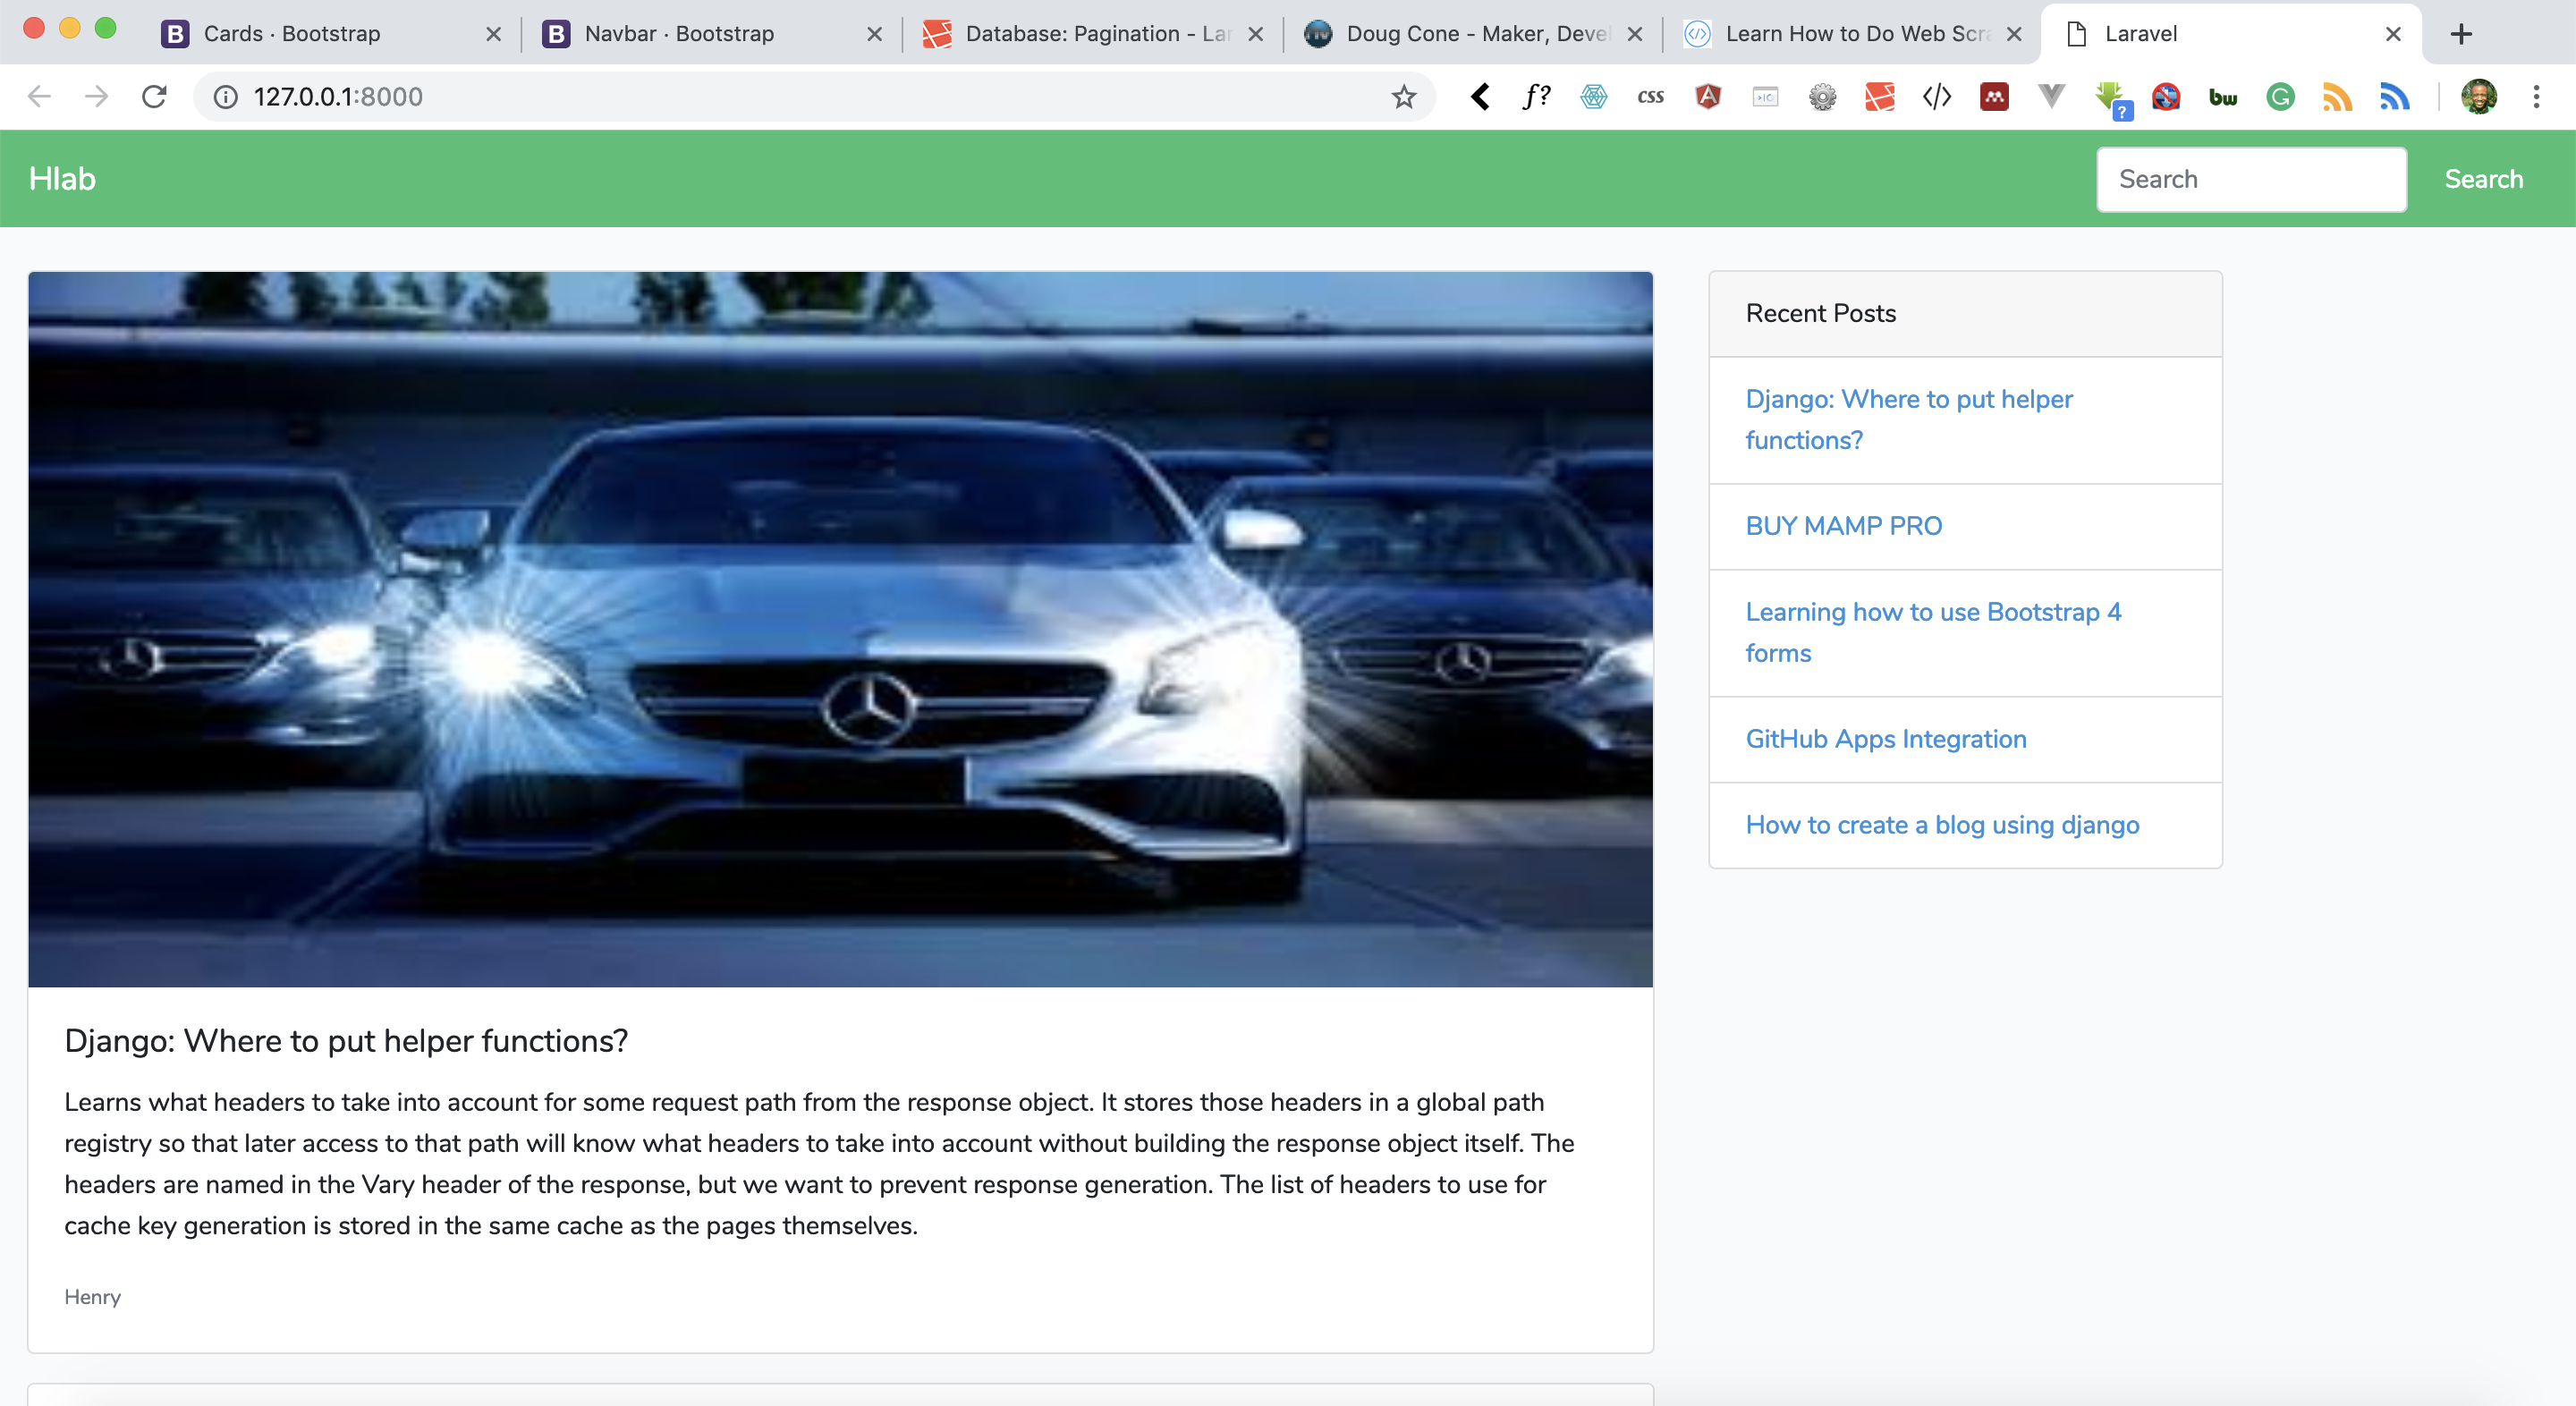
Line 14, we have updated our base URL to point to our index method in PostController. Go back to your browser and reload the page. Here is the output:

This is just to show that the possibilities are endless. Now let’s see how Laravel generates paginations.

Pretty cool, that’s how you can work with paginations.
Goal Achieved
- We have managed to display post to our landing page.
- We have learned about Laravel pagination.
- We have learned how we can display a side navbar.
What next
Now that we have learned a little bit of Laravel, here is a list of resources that we believe that can improve your skills:
The important thing is to keep, challenging yourself with new project. With that we conclude our Laravel blog tutorial.
You can grab the code used in this tutorial at blog application in Laravel 5.7


Facebook Comments