Hello and welcome to this Python/Django tutorial series, my name is Henry Mbugua and I will be taking you through the various aspects and new answers of how to build better software using Test Driven Development. In lesson 2, we created a new Django project and we also learned that we are going to develop a blog application as we learn how to write test cases in the Django web framework. The main goal is not the blog, the main goal is test cases. If you would like to focus mainly on how to create a blog, here is a wonderful tutorial on how to create a blog in Django 1.11 and Python 3.5.
NB: The take away in this tutorial series should be the process and the change in approach required. It’s a methodology, not a technology. It’s a way of building applications and a discipline that requires practice.
Connecting Our Github Repository with Travis CI
The next step is to connect our Github repository that we created in Lesson 2 with Travis CI. In lesson 2, we had created a Github repository and I am going to login to my Travis Account via my Github account. Here is a screenshot of my Travis CI dashboard,
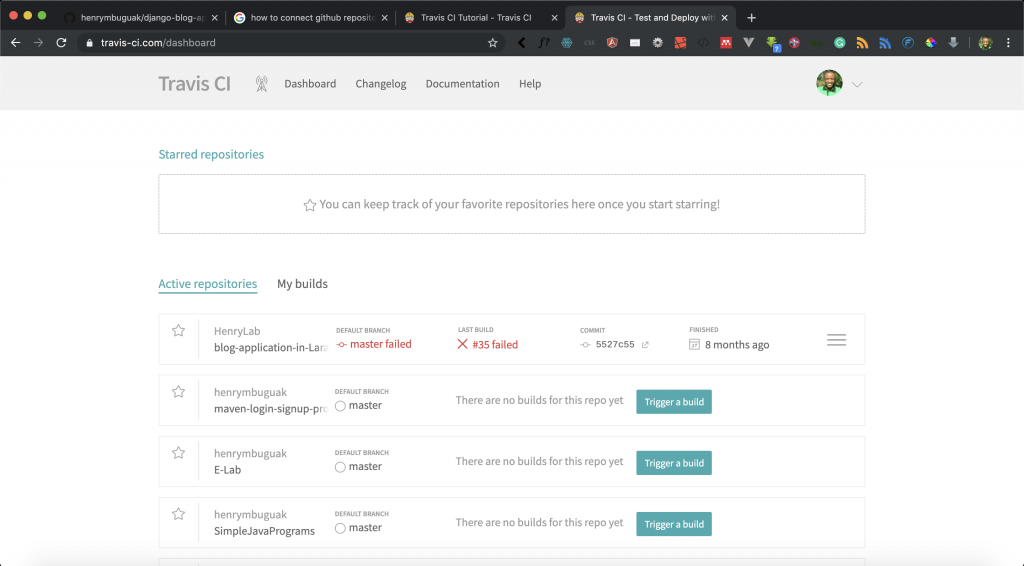
Your dashboard might be a little bit different since I have a couple of projects connected to Travis CI via my Github account, this is a list of projects in my Github account. In order for us to connect our project to Travis CI, we are going to create a .travis.yml file in our project root directory so that we can trigger a Travis CI Build every time we push our code to Github. Now let’s go back to our code and add .travis.yml file in our project base directory, where manage.py file is located. Your directory should look like this,
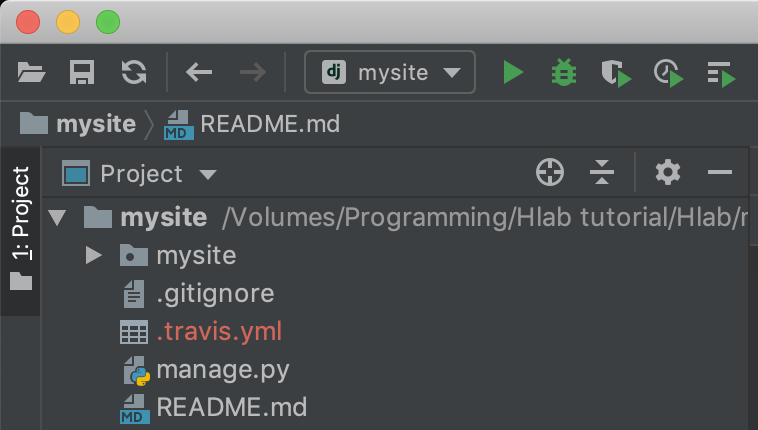
Make sure your .travis.yml file has the following code:
language: python
python:
  - "2.7"
  - "3.4"
  - "3.5"
  - "3.6"      # current default Python on Travis CI
  - "3.7"
  - "3.8"
  - "3.8-dev"  # 3.8 development branch
  - "nightly"  # nightly build
# command to install dependencies
install:
  - pip install -r requirements.txt
# command to run tests
script:
  - python manage.py test
Let’s understand the code we have added in this file:
- Line 1 – we define the programming language, in this case, python
- Line 3 to 19 – we define the version of python.
- Line 10 – nightly is a recent version of CPython build
- Line 12 – we pass a keyword install.
- Line 13 – we pass a command for installing our project requirements.
- Line 16 – we pass the command to run our django test cases.
The next step is to create our requirements.txt file. To do that we are going to run the following command in our terminal:
pip freeze > requirements.txt
The above command will check my virtual environment and create a list of all python dependencies installed for this project, hence it’s always advisable to use virtual environments for Django projects. Learn more about how to manage python virtual environments. Now I am going to push my code to Github, by using the following commands:
Command 1:
git add .
Command 2:
git commit -m"creation of travis.yml file and requirements.txt"
Command 3:
git push origin master
After successful pushing my code to Github, here is a screenshot:
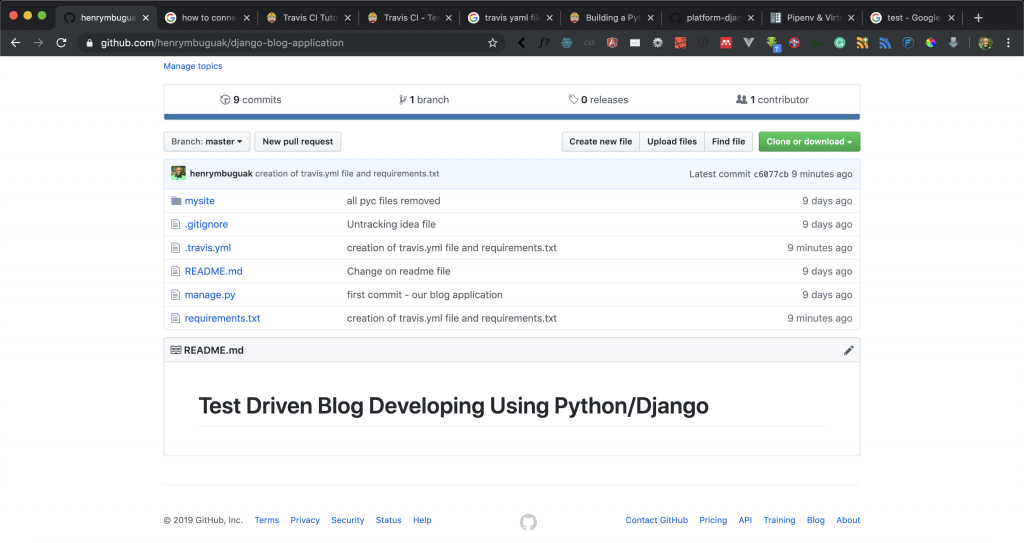
From the screenshot, you can see that now we have .travis.yml and requirements.txt files. We are now ready to connect to this repository. I am going to go back to my Travis CI dashboard and locate this project from the list. Here is a screenshot:
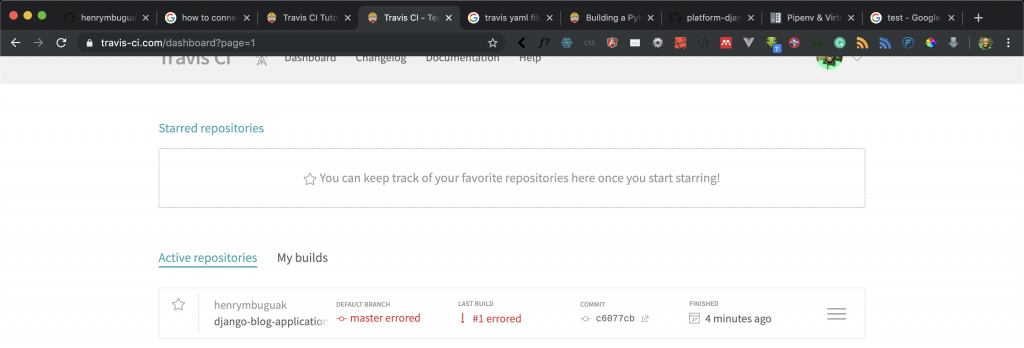
From the screenshot above, you can see that Travis CI created a build automatically, in this case, our build failed with errors. I also receive an email from Travis CI telling me that my automatic build failed, here is a screenshot of the received email.
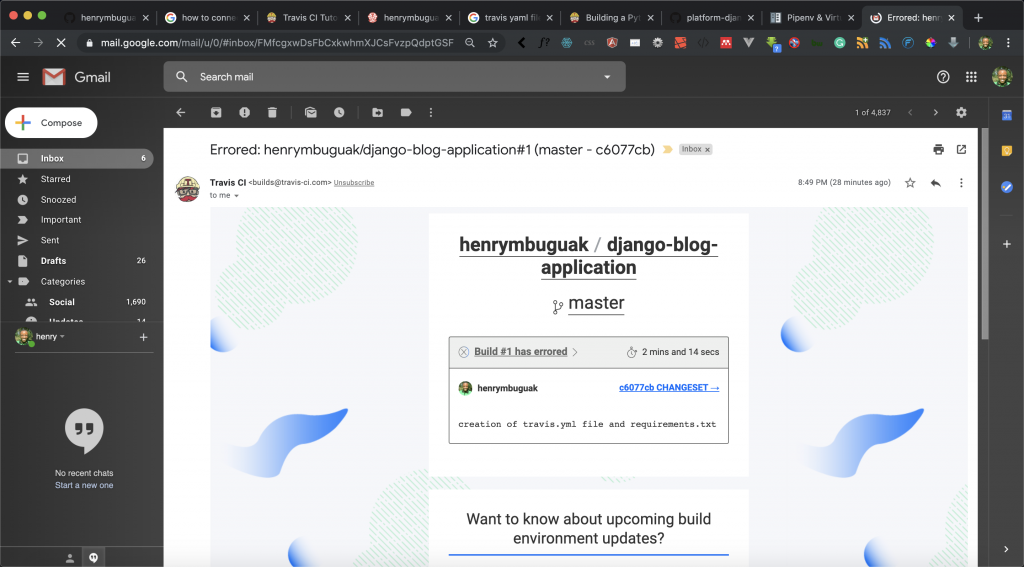
Back in Travis CI, I am going to click on that error and see why it failed. Here is a screenshot of the errors:
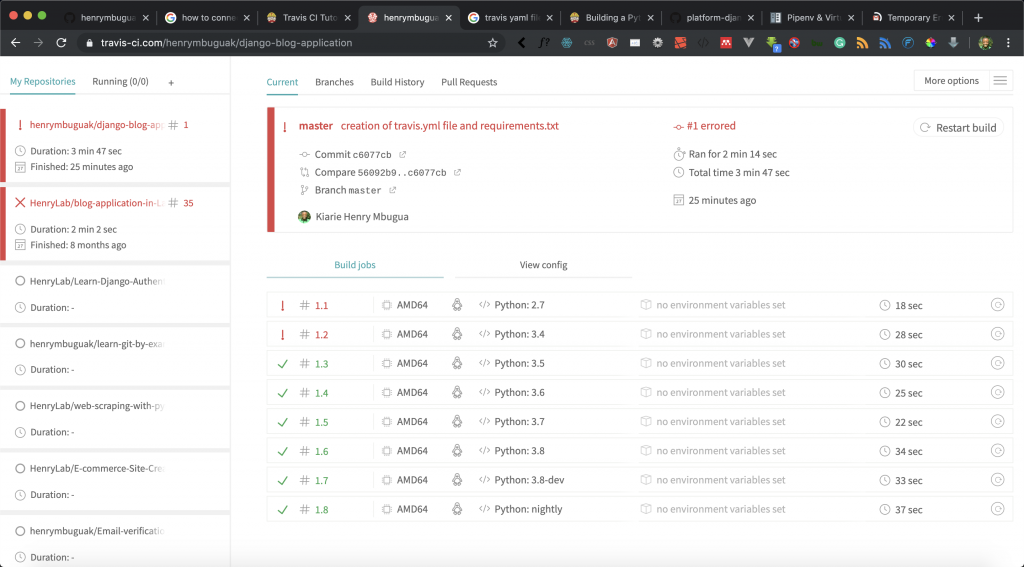
From the above screenshot, I am able to tell that there is fail in creating a build for python 2.7 and python 3.4. At the moment, I am going to update my .travis.yml file by removing python 2.7 and python 3.4. Here is the updated version of my .travis.yml file:
language: python
python:
  - "3.5"
  - "3.6"      # current default Python on Travis CI
  - "3.7"
  - "3.8"
  - "3.8-dev"  # 3.8 development branch
  - "nightly"  # nightly build
# command to install dependencies
install:
  - pip install -r requirements.txt
# command to run tests
script:
  - python manage.py test
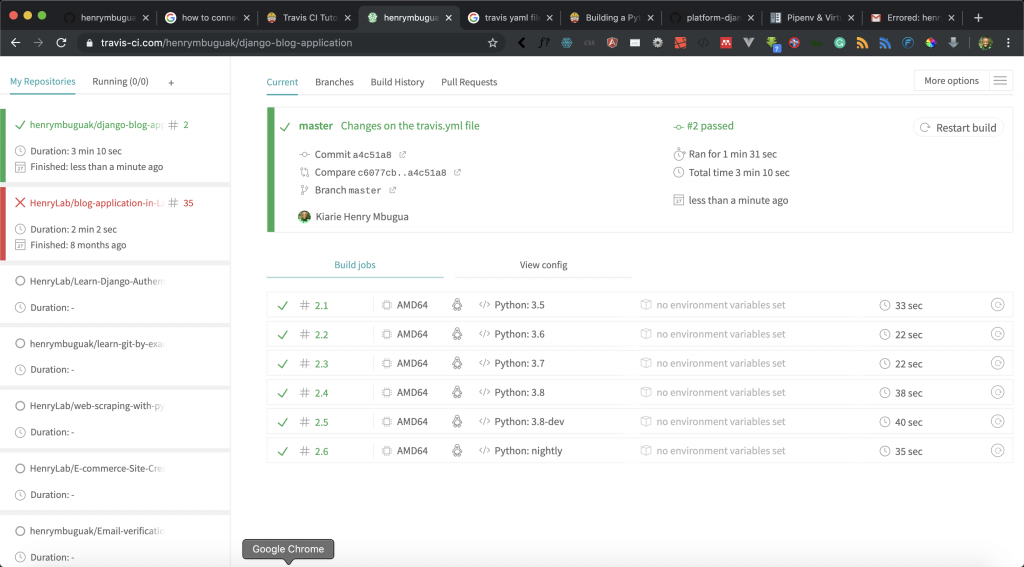
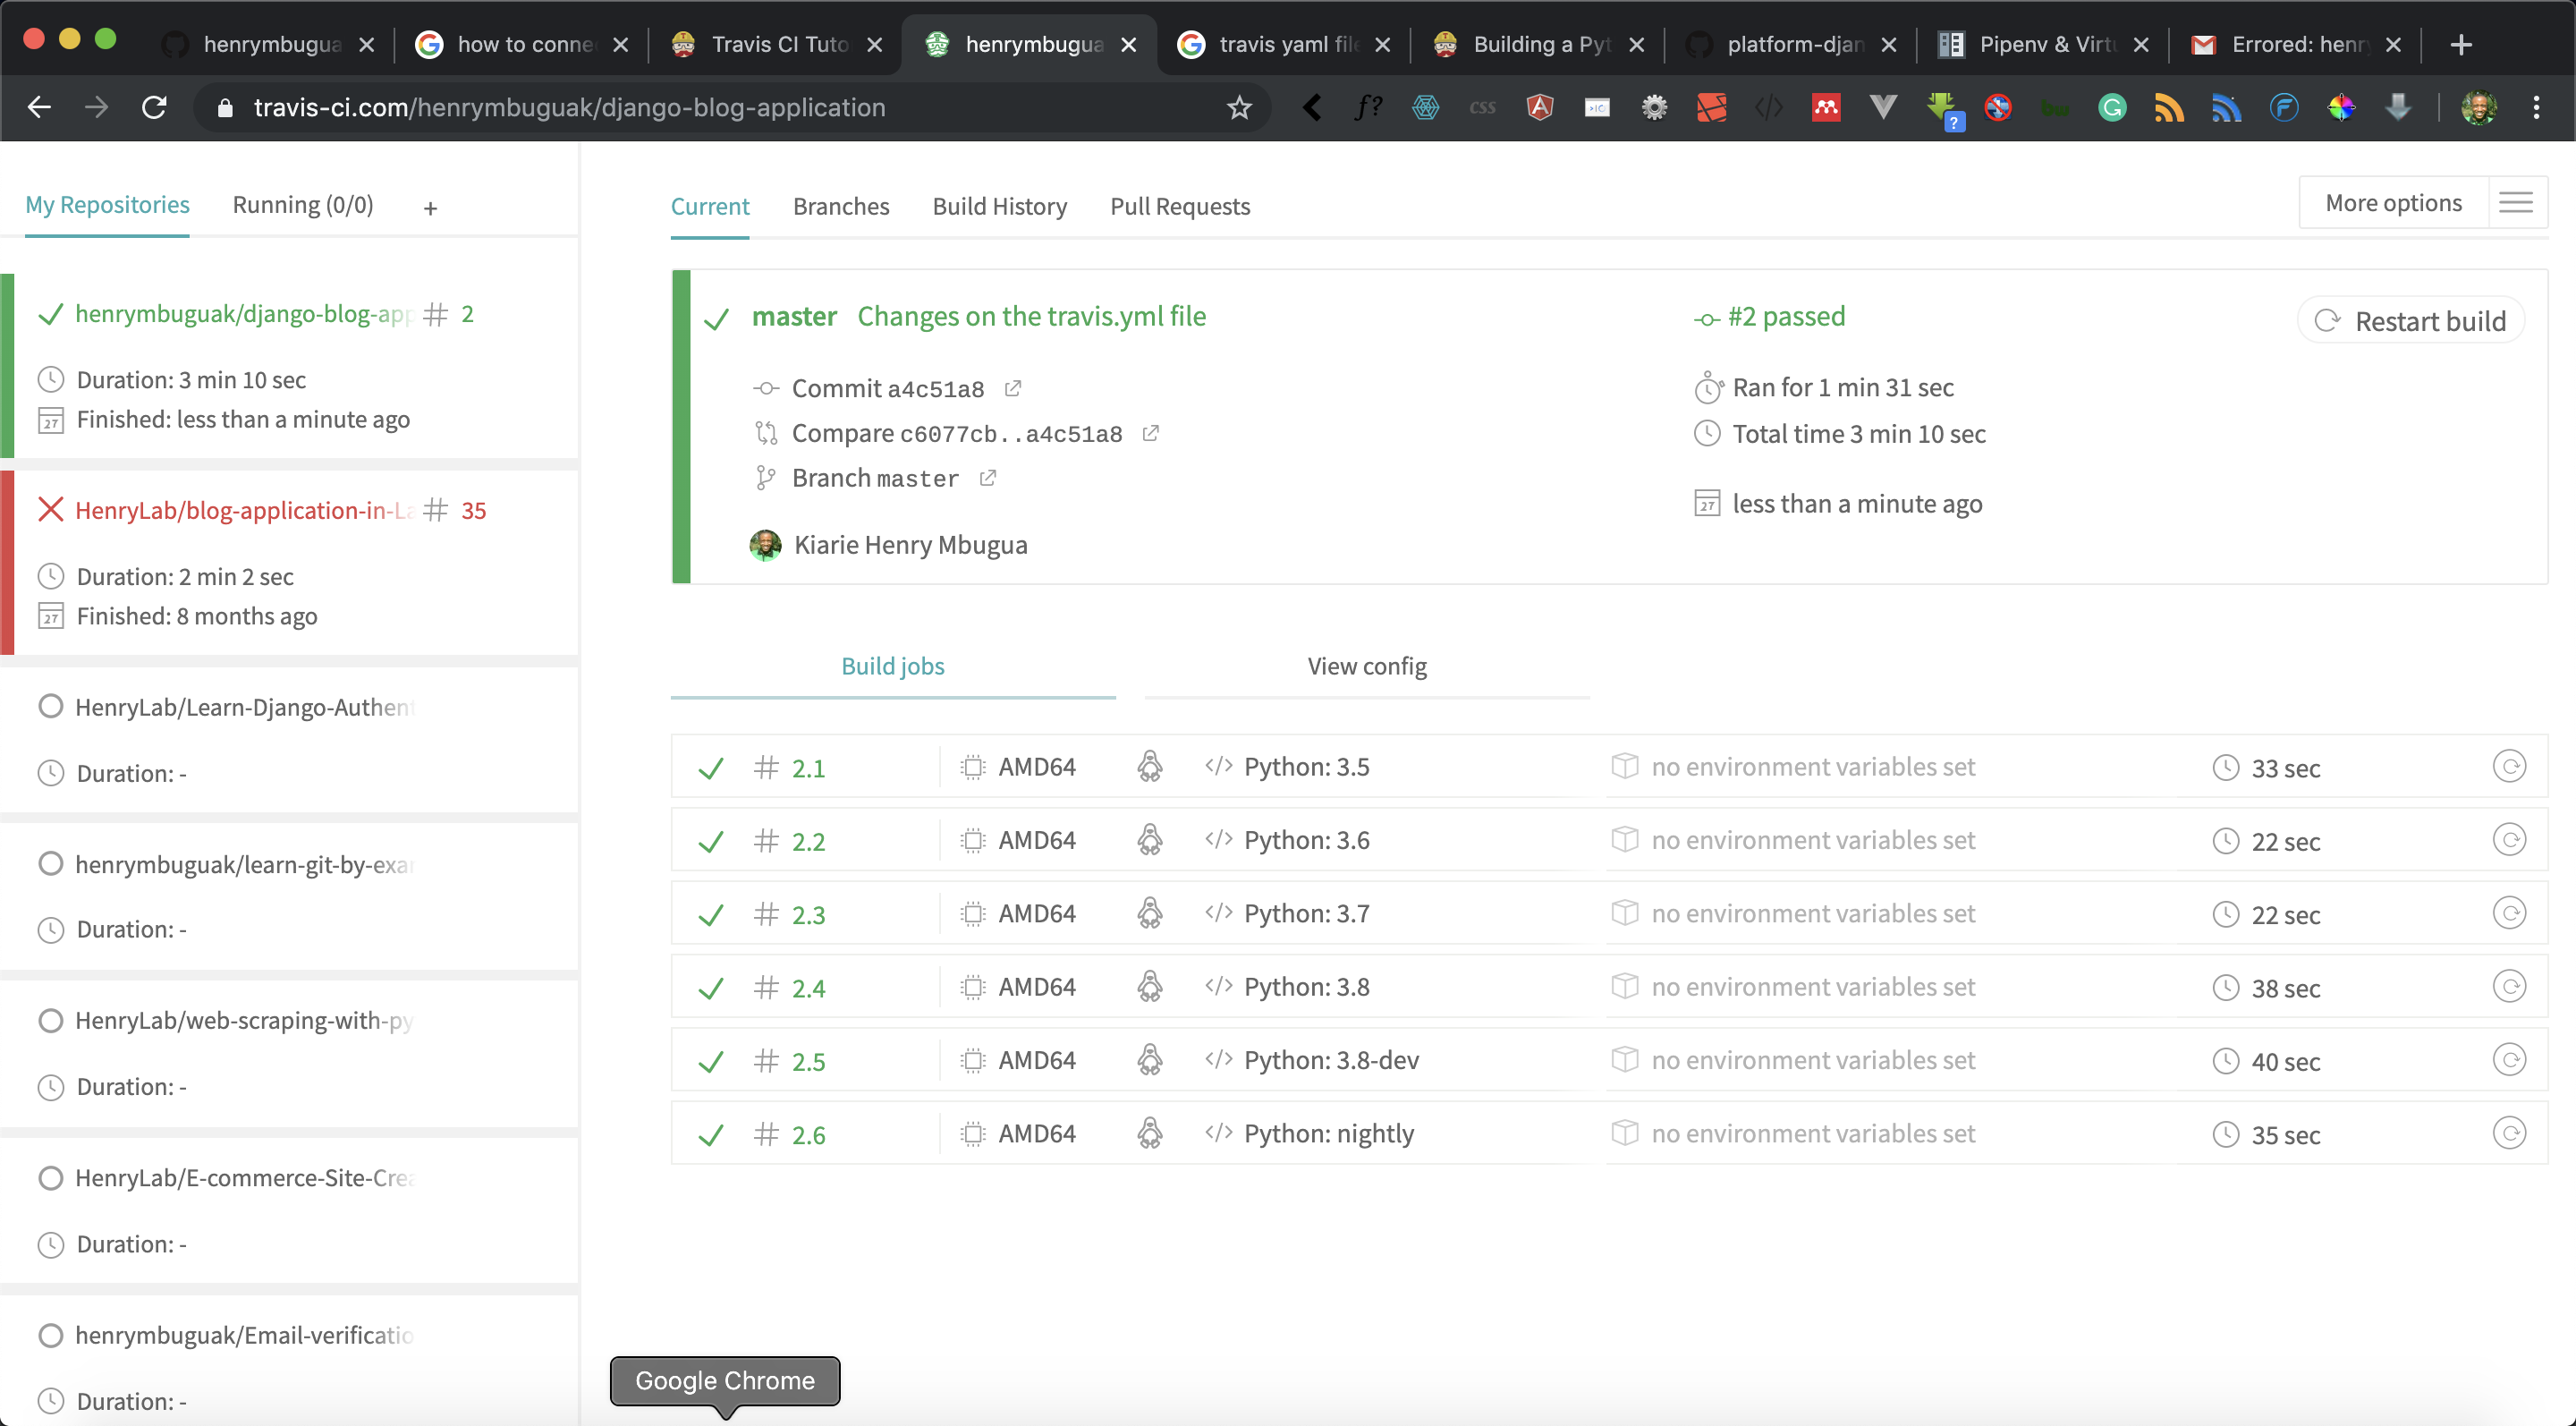
When I go back to Travis CI, the build has already started and completed without any errors, here is a screenshot.
Adding Build Status Badge
In Travis CI, I am going to click on the badge icon next to the title of my project and here is the screenshot.
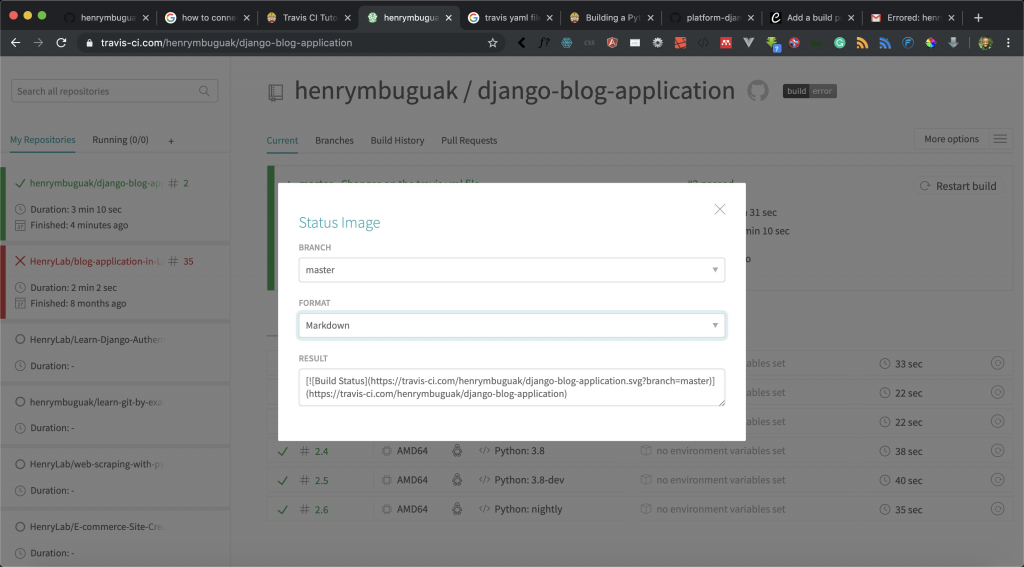
I have selected the master branch, format to be markdown. I am going to copy the content of the results and paste that in my README.md file in my project. Here is the content of my README.md file.
# Test Driven Blog Developing Using Python/Django [](https://travis-ci.com/henrymbuguak/django-blog-application)
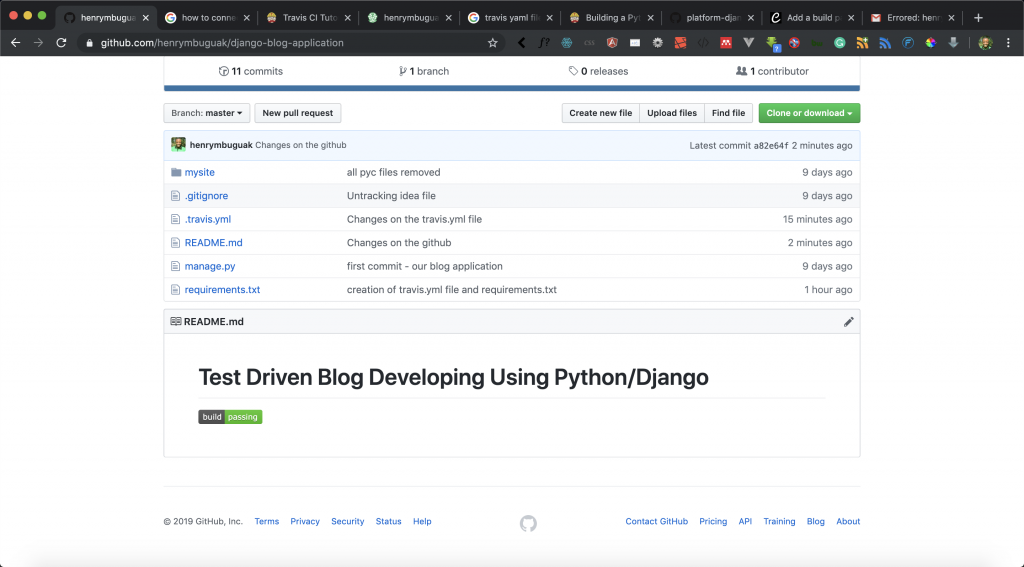
When, I push that to my Github, here is a screenshot of my badge in my Github repository.
Task
The following are important links to learn more about Travis CI and YAML files:
Goal Achieved in this Lesson
In this lesson, we have achieved the following:
- We have learned how to create a .travis.yml file.
- We have learned how to debug an error in Travis CI
- We have learned how to add Build status badge using markdown to README.md file.
With that, we conclude this lesson. We now have a good foundation of how we can achieve an automated test using Travis CI. In our next lesson, we are going to start focusing on writing test cases in our project. To get the code associated with this lesson visit Python/Django Test-Driven Blog Application Development.

Facebook Comments