Hello and welcome to this PHP/Laravel tutorial series, my name is Henry Mbugua and I will be taking you through the various aspects and new answers of how to build real-time interactive text-based solutions that can be accessed on every type of mobile phone, including feature phone, thus a USSD menu. Every time you dial *ABC# to check your airtime balance or to buy bundles on your phone, you are using a more than one-decade old standard called USSD (Unstructured supplementary service data) which has revolutionized how business is done in Kenya and across Africa as a continent. In lesson 1, we learned why USSD is important to Business efficiency and how it can create revenue for the business.
In this lesson, we are going to pick up from where we left, by now you should have an account with Africa’s Talking, there is a basic tutorial to get you started with Africa’s talking USSD gateway. Here is a code sample from Africa’s Talking USSD api. I am going to open our Laravel project with Phpstorm and create a Controller using the make:controller Artisan command. On my terminal, I will run the following command:
php artisan make:controller UssdController
Here is a screenshot of my output:

With the above command, we have created a new controller called app/Http/Controllers/UssdController.php. Now make sure your UssdController.php has the following code:
NB: In our future tutorial we will refactor the code in UssdController.php to make it much cleaner.
<?php

namespace App\Http\Controllers;

use Illuminate\Http\Request;

class UssdController extends Controller
{

    public function onlineUssdMenu(Request $request)
    {
       $sessionId   = $request->get('sessionId');
       $serviceCode = $request->get('serviceCode');
       $phoneNumber = $request->get('phoneNumber');
       $text        = $request->get('text');

        // use explode to split the string text response from Africa's talking gateway into an array.

        $ussd_string_exploded = explode("*", $text);

        // Get ussd menu level number from the gateway

        $level = count($ussd_string_exploded);

        if ($text == "") {
            // first response when a user dials our ussd code
            $response  = "CON Welcome to Online Classes at HLAB \n";
            $response .= "1. Register \n";
            $response .= "2. About HLAB";
        }

        elseif ($text == "1") {
            // when user respond with option one to register
            $response = "CON Choose which framework to learn \n";
            $response .= "1. Django Web Framework \n";
            $response .= "2. Laravel Web Framework";
        }

        elseif ($text == "1*1") {
            // when use response with option django
            $response = "CON Please enter your first name";
        }

        elseif ($ussd_string_exploded[0] == 1 && $ussd_string_exploded[1] == 1 && $level == 3) {
            $response = "CON Please enter your last name";
        }

        elseif ($ussd_string_exploded[0] == 1 && $ussd_string_exploded[1] == 1 && $level == 4) {
            $response = "CON Please enter your email";
        }

        elseif ($ussd_string_exploded[0] == 1 && $ussd_string_exploded[1] == 1 && $level == 5) {
            // save data in the database
            $response = "END Your data has been captured successfully! Thank you for registering for Django online classes at HLAB.";
        }

        elseif ($text == "1*2") {
            // when use response with option Laravel
            $response = "CON Please enter your first name. ";
        }

        elseif ($ussd_string_exploded[0] == 1 && $ussd_string_exploded[1] == 2 && $level == 3) {
            $response = "CON Please enter your last name";
        }

        elseif ($ussd_string_exploded[0] == 1 && $ussd_string_exploded[1] == 2 && $level == 4) {
            $response = "CON Please enter your email";
        }

        elseif ($ussd_string_exploded[0] == 1 && $ussd_string_exploded[1] == 2 && $level == 5) {
            // save data in the database

            $response = "END Your data has been captured successfully! Thank you for registering for Laravel online classes at HLAB.";
        }


        elseif ($text == "2") {
            // Our response a user respond with input 2 from our first level
            $response = "END At HLAB we try to find a good balance between theory and practical!.";
        }


        // send your response back to the API
        header('Content-type: text/plain');
        echo $response;
    }
}
Now let’s understand the code in this file:
- Line 10 to 86 – we have created a function called onlineUssdMenu.
- Line 12 to 15 – we define the variables that we get from Africa’s Talking gateway.
- Line 12 – sessionId is a unique value generated by Africa’s talking every time a user dials your USSD code.
- Line 13 – serviceCode is your USSD code.
- Line 14 – phoneNumber is the mobile number used to dial your USSD code.
- Line 15 – text is user input in the form of a string. Africa’s Talking concatenates all the user’s input within the session with an * until the session ends.
- Line 19 – we create a variable called ussd_string_exploded and use a PHP function called explode which split a string based on a string delimiter, in this case, *. The explode function returns an array which makes it easy for us to consume user inputs from Africa’s Talking gateway.
- Line 23 – we define another variable called level which will help us keep track of the level by counting our exploded ussd_string_exploded.
- Line 25 to 30 – we start by defining our USSD application control statement using if which execute if a specified condition has been met. In this controller statement, we respond to the user with two options of selecting whether to register as option one or about HLAB as option 2.
- Line 27 – we start our response with a keyword CON which tells the mobile operator that our session is ongoing.
- Line 32 to 37 – if a user selects option one to register, we respond with this menu. Where we ask which framework they want to learn.
- Line 39 to 42 – if a user selects option 1 which is register for the Django web framework, we ask the user for the first name.
- Line 44 to 46 – Here is where things get interesting, since we cannot tell which name the user input, we have to find a way of specifying condition, hence($ussd_string_exploded [0] == 1 && $ussd_string_exploded [1] == 1 && $level == 3) If you recall, when we use explode() our string is turned into array and what we are saying here is, if at index 0, the responded with 1 and at index one the user responded with 1 and we also check which level the users is at. If all the conditions are met, we ask the user for their last name
- Line 48 to 50 – we pass the same conditions as we did inline 44 the only thing that changes is the level. At this point, we are at level 4.
- Line 52 to 55 – we pass the same conditions as line 44 but the level changes to level 5.
- Line 54 – Note that we start our response with the keyword END, which tells our mobile operator that the session has ended.
- Line 57 to 60 – if the user selected to register for the Laravel web framework, we respond by asking them to input their first name.
- Line 62 to 64 – At this point, we also use array to determine which level the use is at, hence (($ussd_string_exploded [0] == 1 && $ussd_string_exploded [1] == 2 && $level == 3) at this point we are saying if at index 0 the user selected 1 and if at index 1 the user selected option 2 and the level is 3. Ask the user for the last name.
- Line 66 to 68 – we pass the same conditions as line 62 but the level changes to 4. At this point, we ask the user to input the email.
- Line 70 to 74 – we pass the same conditions as inline 62 but the level changes to 5. We start our response with the keyword END, which tells our mobile operator that the session has ended.
- Line 77 to 80 – if the decision was to learn about Hlab when they first dialed our USSD code, we responded by this section.
- Line 84 – we set our content type to be of text plain, this is how we respond back to Africa’s talking gateway.
- Line 85 – we use echo, which is a PHP function to display the output.
The next step is to create a route that comes to this method. In your routes folder, open api.php file and make sure it has the following code:
<?php

use Illuminate\Http\Request;

/*
|--------------------------------------------------------------------------
| API Routes
|--------------------------------------------------------------------------
|
| Here is where you can register API routes for your application. These
| routes are loaded by the RouteServiceProvider within a group which
| is assigned the "api" middleware group. Enjoy building your API!
|
*/

Route::middleware('auth:api')->get('/user', function (Request $request) {
    return $request->user();
});


Route::post('v1/online/ussd/service', 'UssdController@onlineUssdMenu');
On line 21, we create a post route, which goes to our UssdController.php at our method called onlineUssdMenu.
How to Test our Code if it is working
To test our code, I am going to my terminal and run Laravel development server by using the following command:
php artisan serve
Here is the output of my terminal:

At this point, I can tell that my application is running at port 8000. I will be using Ngrok to create a secure URL for my localhost. Learn more about Ngrok. To create a secure URL using Ngrok, I am going to run the following command:
./Ngrok http 8000
Here is a screenshot of my terminal
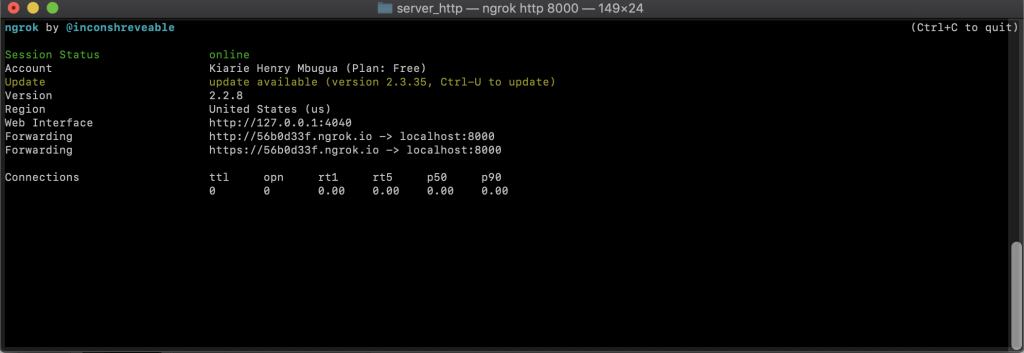
Now that I have my secure URL created, the next step is to log in to Africa’s Talking account. We are going to use, Africa’s Talking sandbox to test our USSD.
Using Africa’s Talking Sandbox
You can use this link to login when you log in to your Africa’s Talking account, you will see the following dashboard.
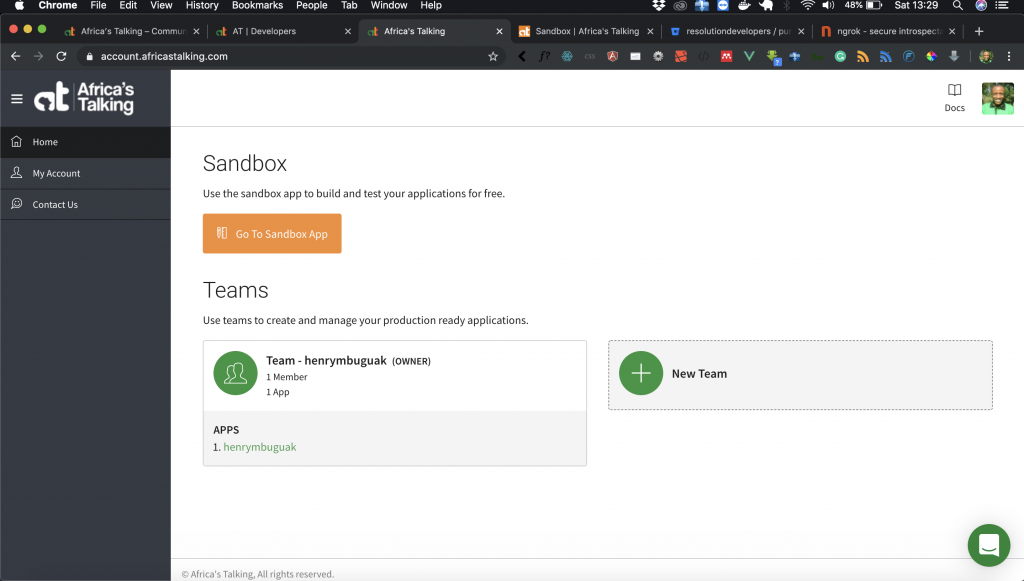
Click on the Go to Sandbox App button and you get the following screenshot:
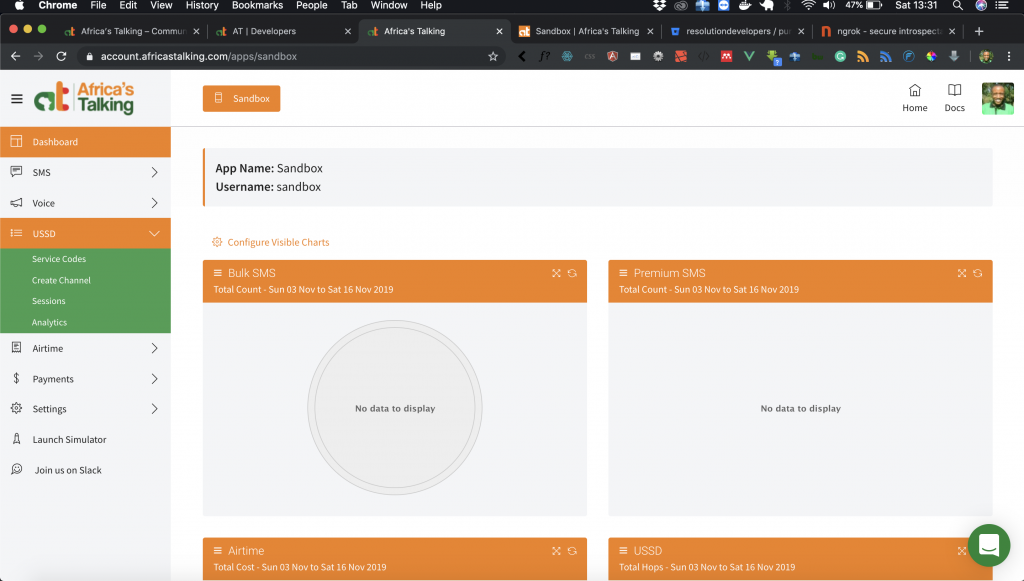
When you click on USSD, a drop-down menu appears. Click on Service Codes and you will get the following screenshot.
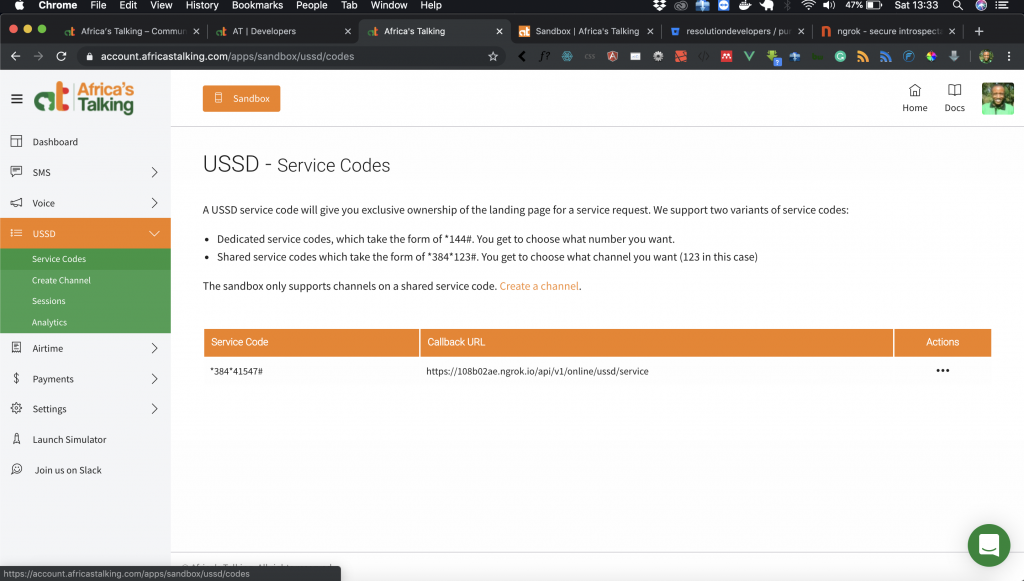
At this point, you will see the instruction on how to get your shared USSD code. To create a channel for this test, click on Create a channel link. Here is a screenshot,
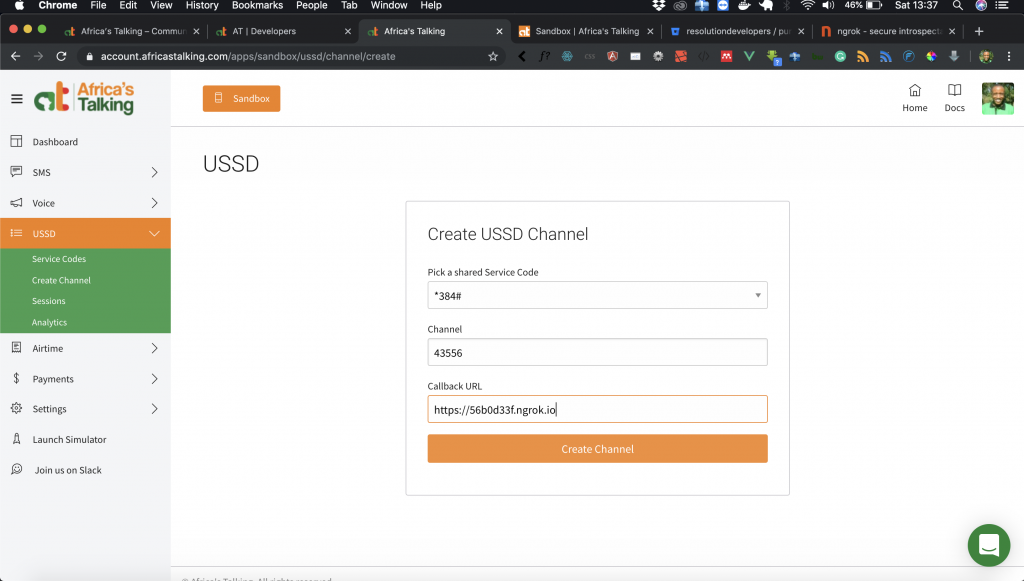
At this point, you will need to add your callback URL, in this case, I have added my secure URL we created using Ngrok. I have also chosen my channel number. After that, hit Create Channel button, you get the following screenshot.
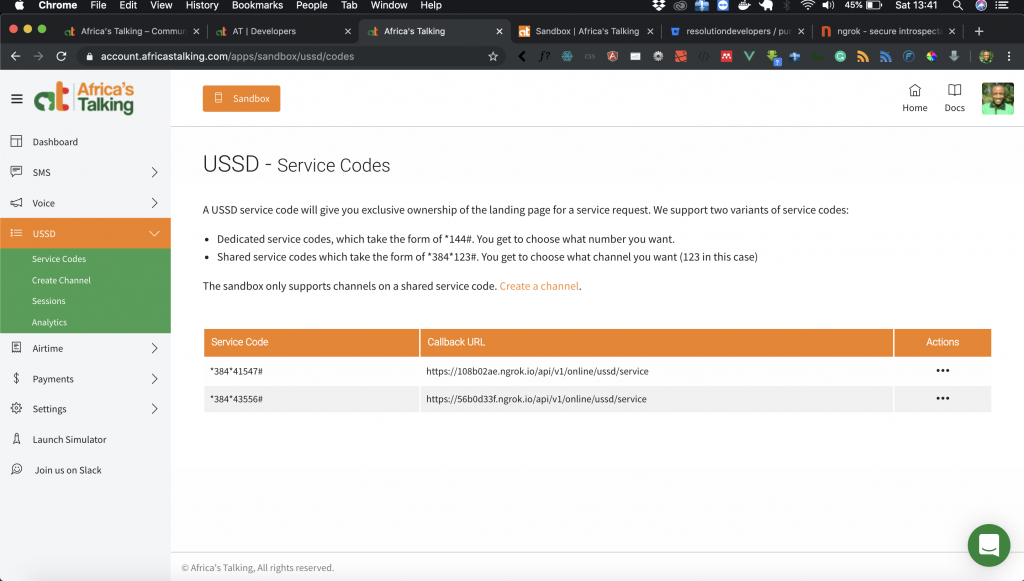
Now we are ready to test, on the left side navigation you will see a link called Launch Simulator. Click it and you get the following screenshot:
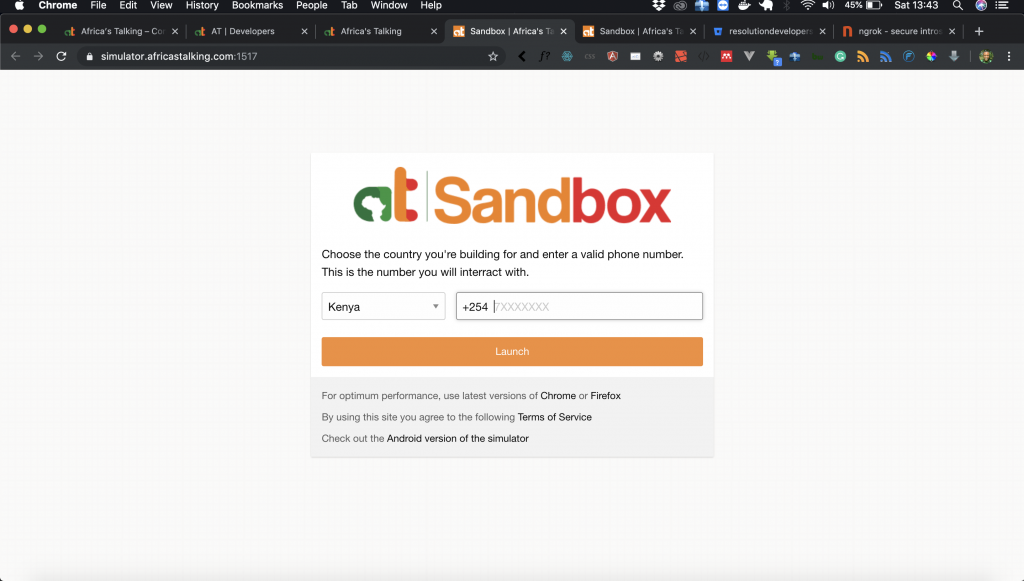
At this point, you will be asked to input your phone number. Once you are done, hit the launch button and you get the following screenshot.
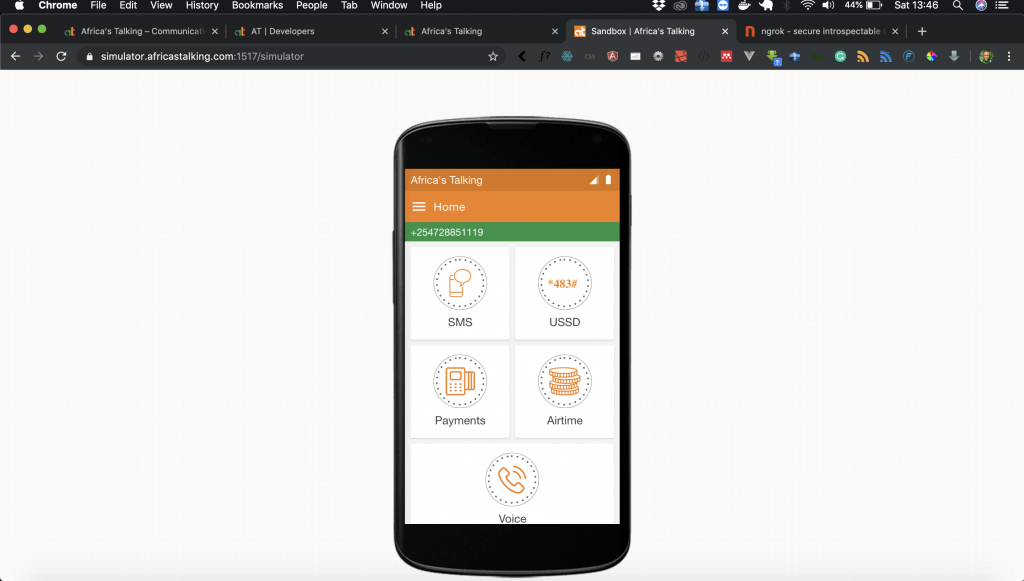
Since we are dealing with USSD, select USSD and you get the following screenshot:
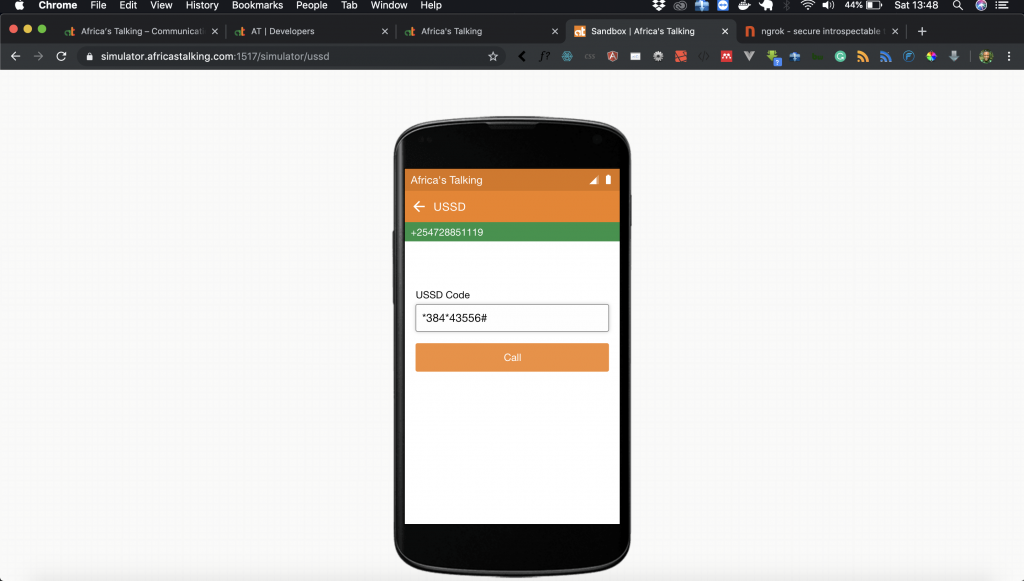
At this point, I have put my USSD channel number. When I hit call, I get the following results:
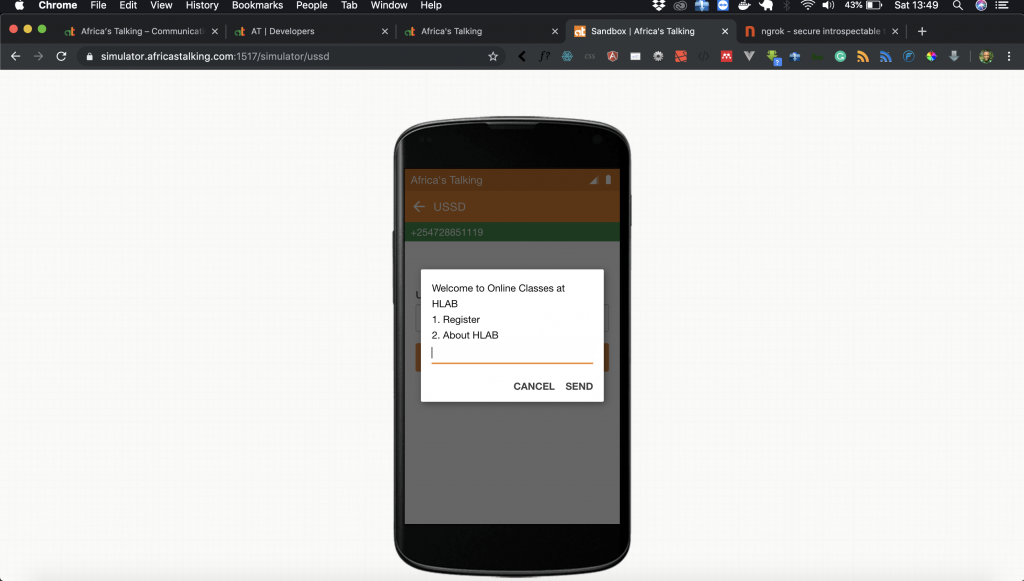
I am going to respond with 1, for me to register. Here is a screenshot of the response:
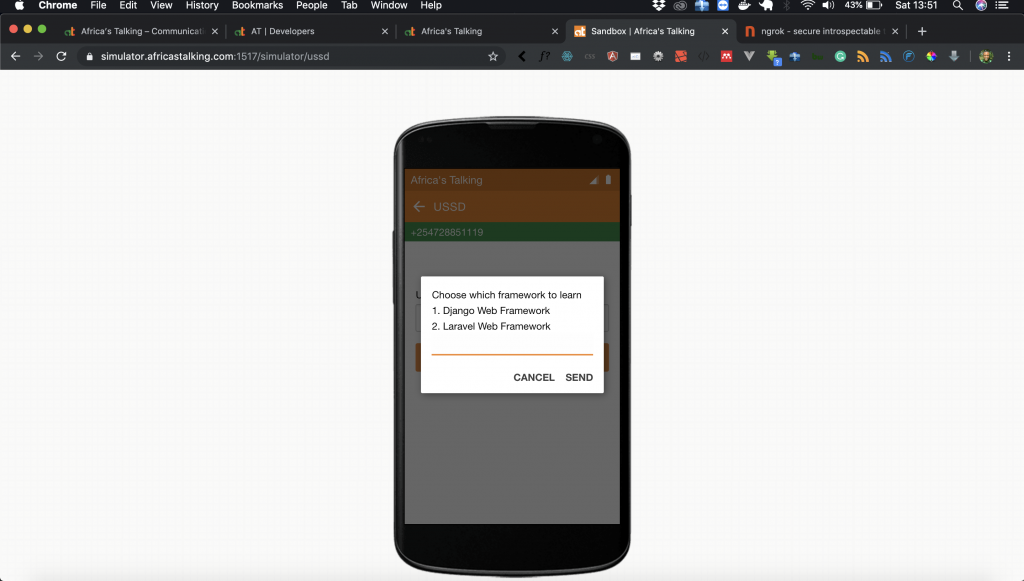
I will select option 1, the Django web framework. Here is a screenshot of the response:
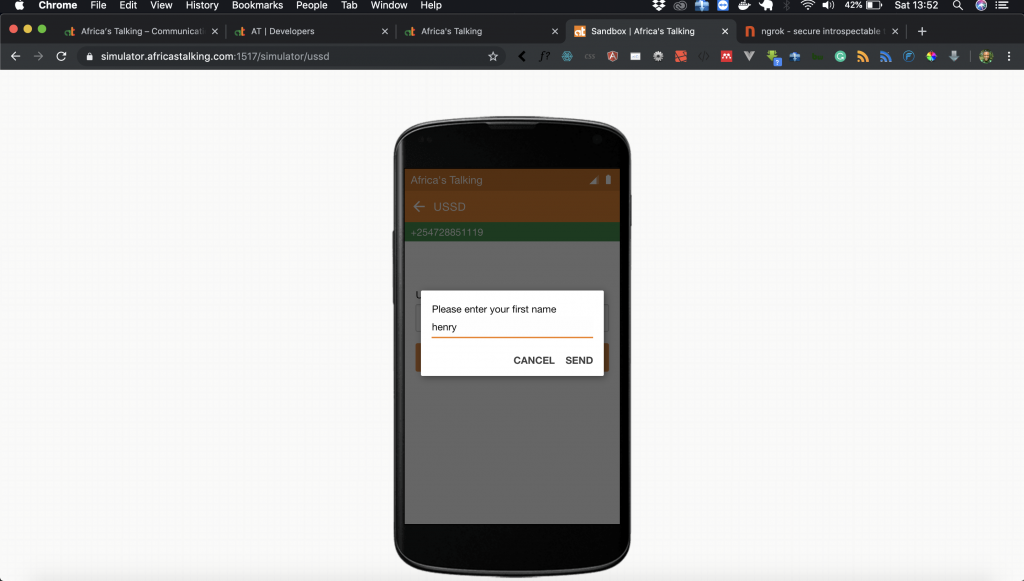
Now I am asked to input my first name. When I input the first name I get the following response:
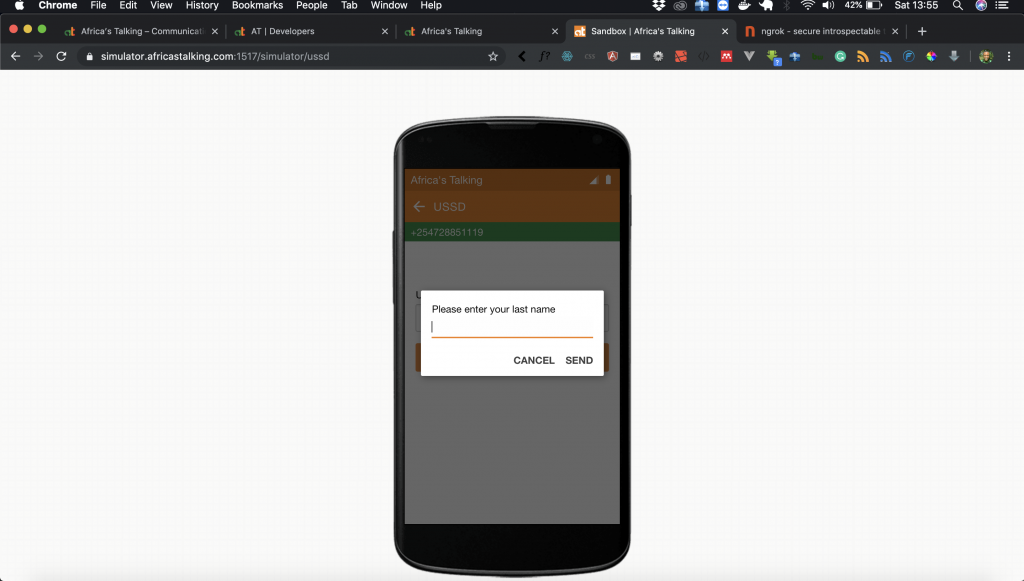
Now I am going to input my last name when I input the last name I get the following response:
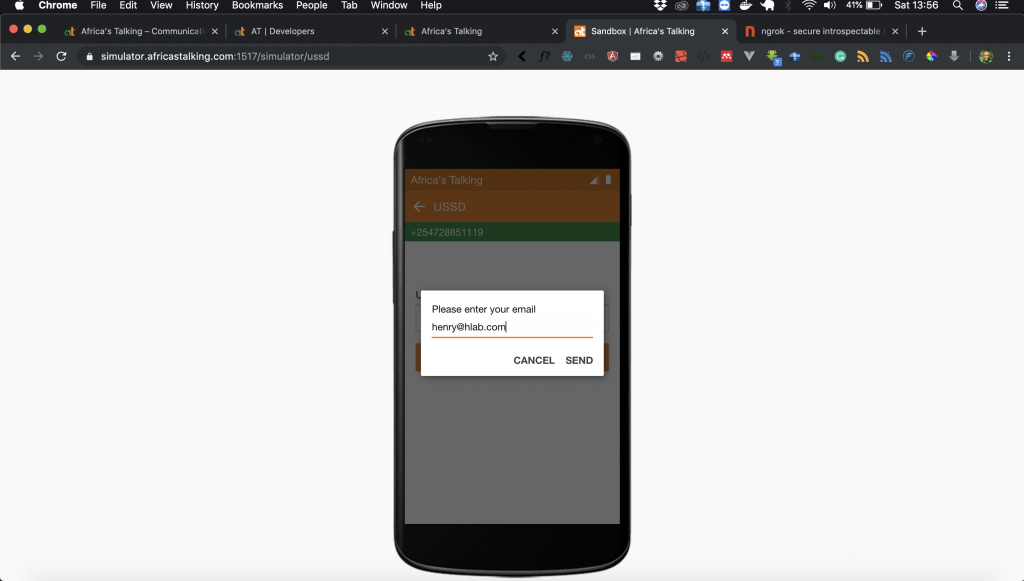
Now I am asked to input my email. After inputting my email, here is the response.
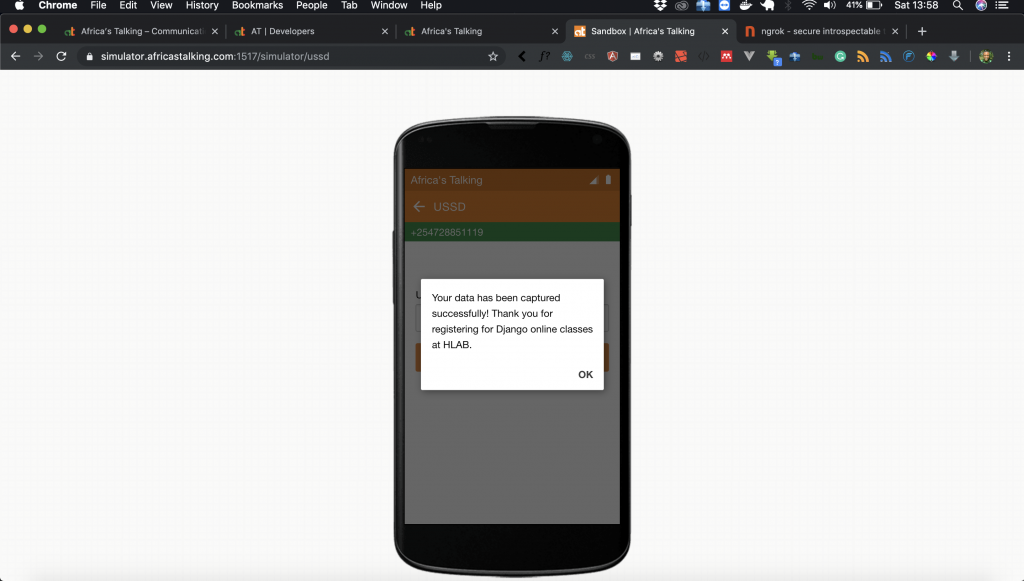
I get a success message from our application that my data has been captured successfully.
Task
Try to figure out how you can save user response in the database.
Goal Achieved in this lesson
In this lesson, we have achieved the following:
- We have learned how to create business logic for our USSD application.
- We have learned how to use Ngrok to create a secure URL for our localhost tunnel.
- We have learned how to use Africa’s talking sandbox and simulator.
With that, we conclude this lesson, in our next lesson we are going to implement the ability to save the data in the database. To get the code associated with this lesson visit Php/Laravel USSD Application.


Facebook Comments