Hey and welcome to this Python/Django tutorial series, my name is Henry Mbugua and I will be taking you through the various aspect and new answer of M-pesa Integration using Django web framework and Python 3.7. Django is a powerful Python web framework that can help you develop web applications quickly, from a simple prototype to large scale projects. Django will help you adopt a clean and pragmatic design using a comprehensive set of tools to build scalable web applications.
Safaricom is a leading communications company in Kenya with the widest and strongest coverage. One of the leading Safaricom products is Mobile Money service, M-PESA which has transformed the Kenyan economy. From small business to Multibillion companies have integrated to M-Pesa API, which offers versatile Integration capabilities across different industries they serve.
M-PESA Integration
In this tutorial series, we are going to learn how to Integrate to Mpesa API using Django web framework and Python, a step by step guide. As a developer, you will need an account with Safaricom Developers Portal, if you don’t have an account with Safaricom Developers Portal, click on M-Pesa Daraja. When you click on the M-Pesa Daraja link, you will get the following screen:

Fill in the sign-up form and you will be logged in to your developer’s portal. If you have an account, log in to your account and here is developers account screen:

You will see the above screen, if you have never created an app in Daraja Portal, then you will not see any apps. M-Pesa developer’s portal has a clean and usable interface. The next step we are going to do is to create an app that we are going to use in this tutorial series.
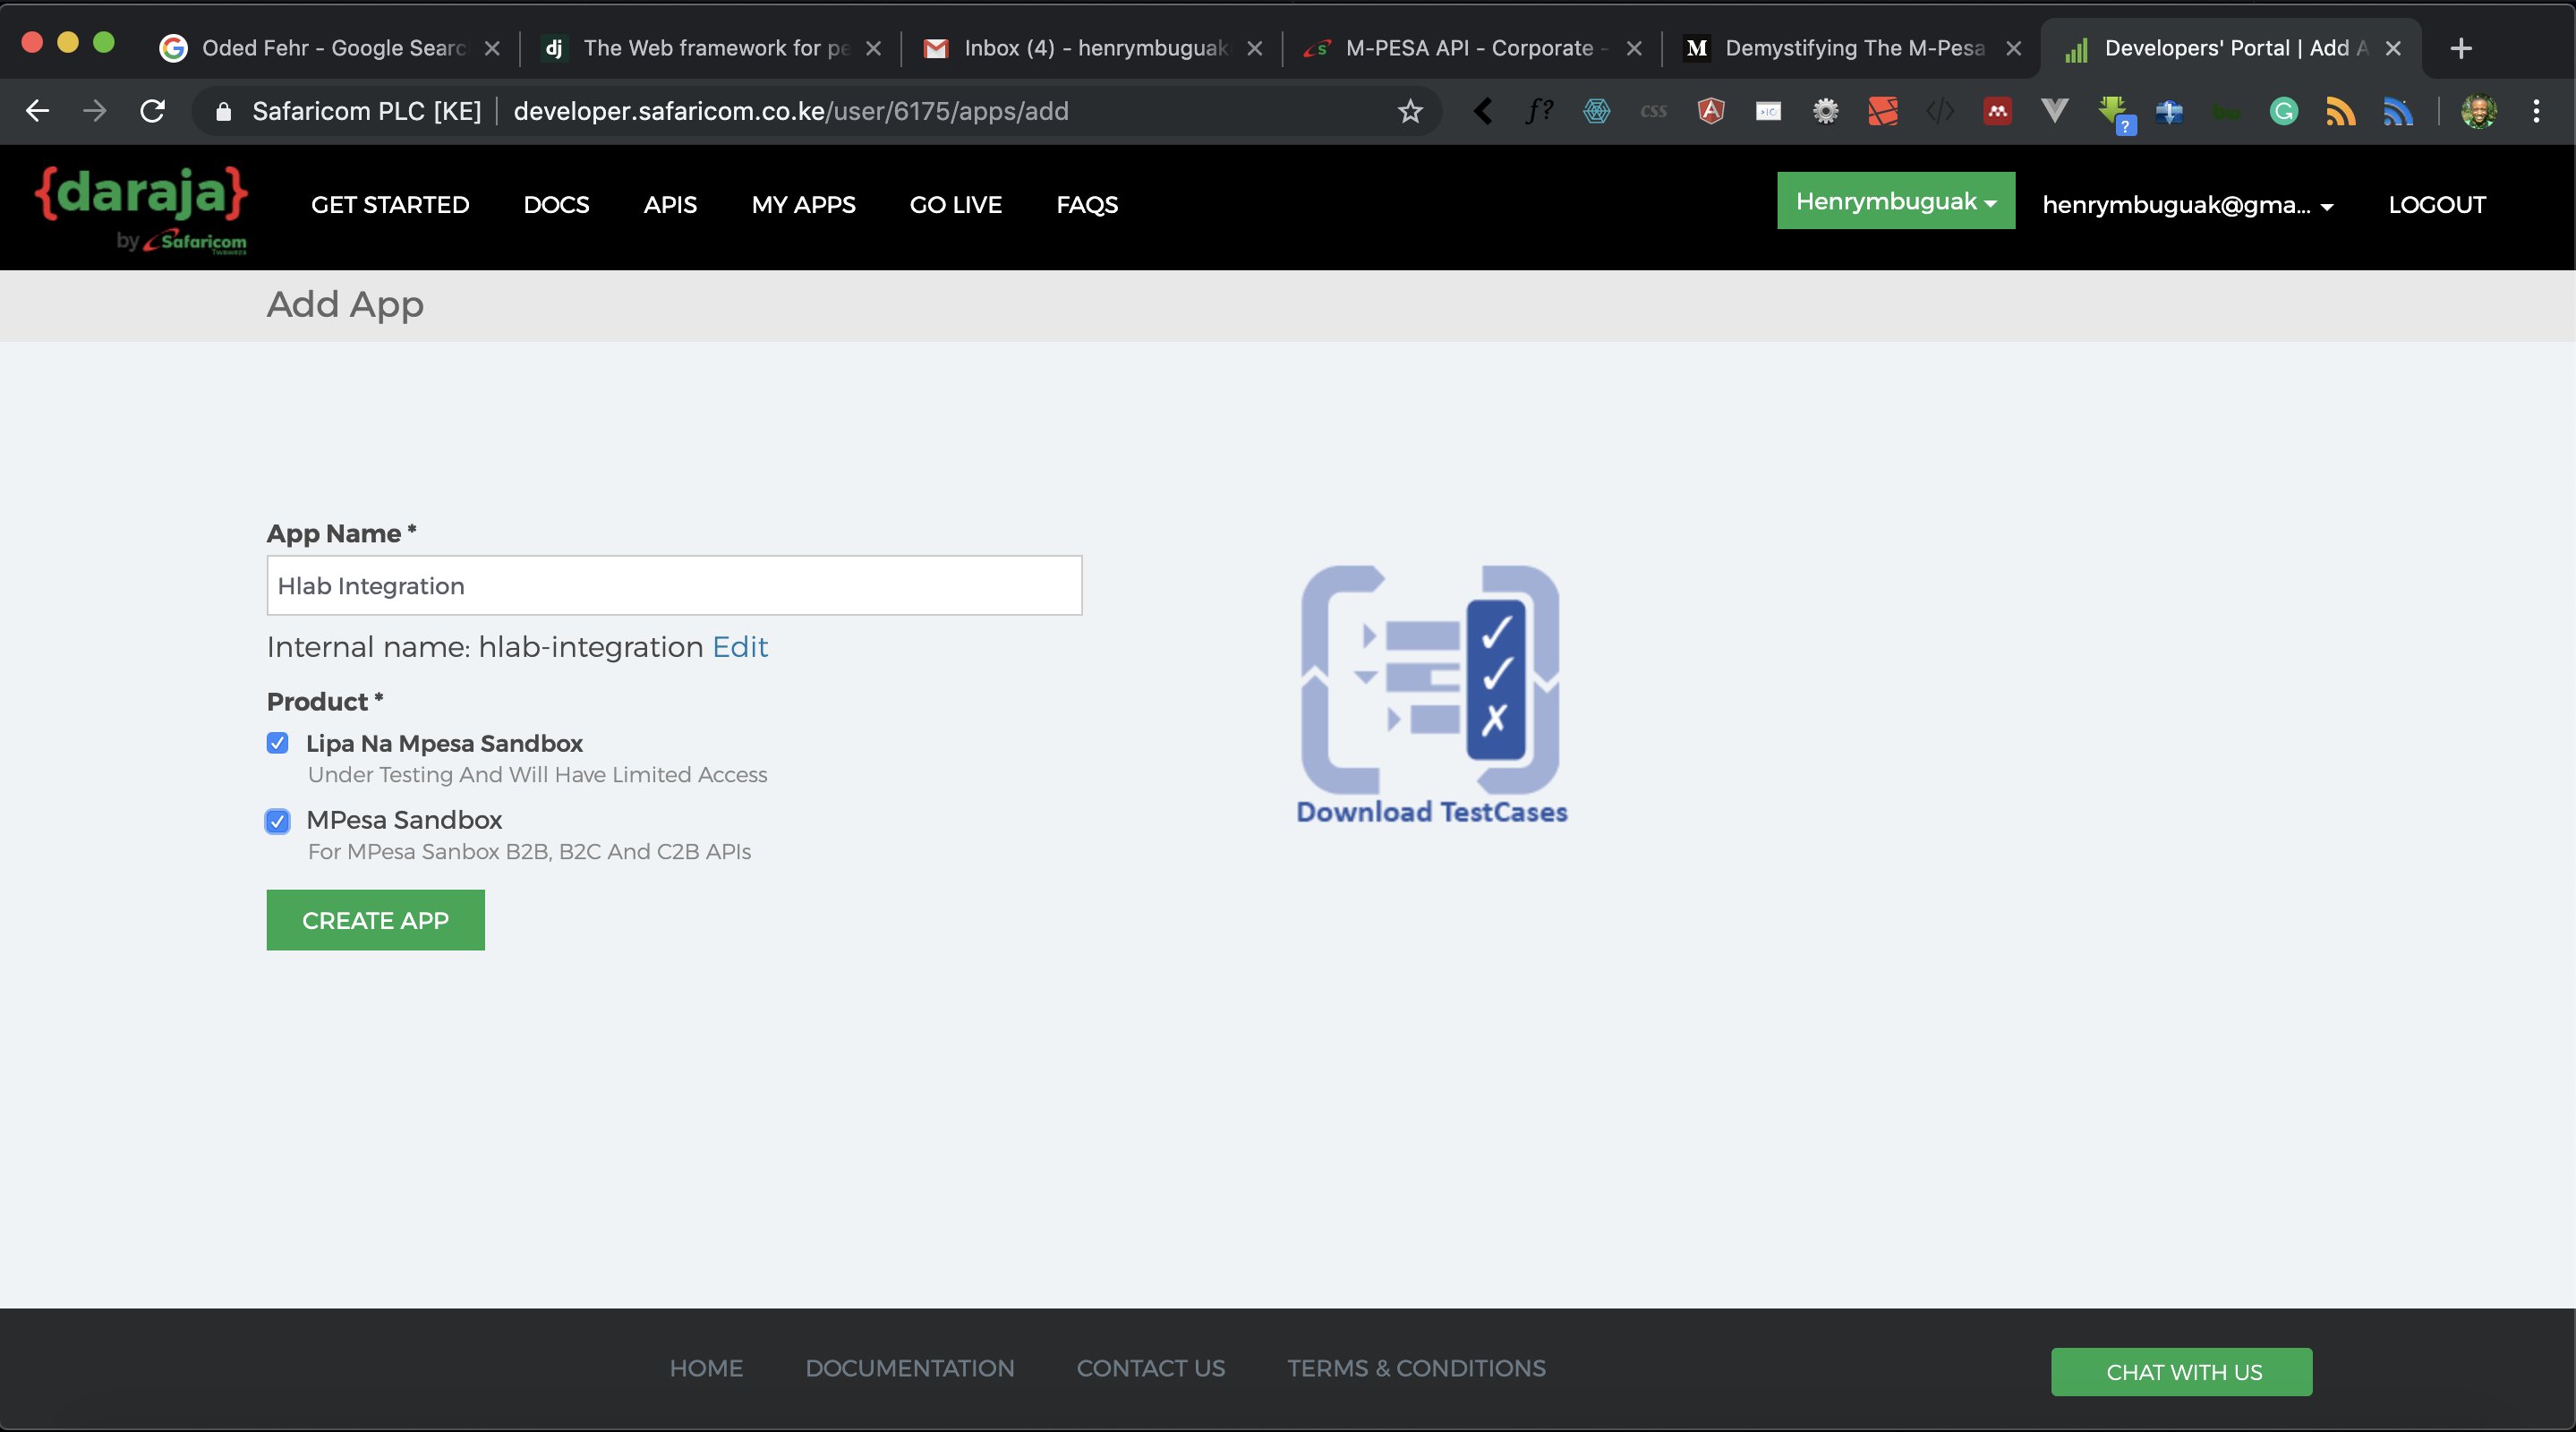
At the top right of the page, there is a green button which has “Add a new App” phrase. Click on that button and you will get the following screen:

Fill in the App Name, on the product make sure you select Lipa Na Mpesa Sandbox and Mpesa Sandbox. We are going to use Mpesa sandbox to develop our integrations. When you are done hit CREATE APP button. You get the following screen:

Safaricom will give you a success message and show which app is new, in my case is Hlab Integration. Click on your newly created app, you see the following screen:

Safaricom will give you the details of your app, you see the following tabs:
- Keys – In this tab, you get your consumer key and consumer secret. Note: These keys should be private, do not share with anyone.
- Products – This tab shows which API product you are using.
- Analytics – shows how you interact with Mpesa API from your application.
- Edit ‘App name’ – you can also edit your app details.
- Delete ‘App name’ – you can also delete your app.
Task
Now that we have a little bit understanding of M-Pesa Portal, it’s time for us to do the actual coding. Here is a link to M-Pesa API documentation. Go through the documentation before our next Lesson.a
Goal Achieved in This Lesson
The following are the goals achieved in this lesson:
- Register an account on M-pesa developer’s portal
- Created an app on Daraja Portal.
- A quick overview of the created app
In the next lesson, we will set up our Django project and start the actual coding. Hope to see you in Lesson II.


Facebook Comments