Hello and welcome to this Vue js tutorial series, my name is Henry Mbugua, I will be taking you through the various aspects, and new answers of how to consuming Nasa Open APIs using Vue.js and Axios.js which is a promise-based HTTP client for browsers and node.js, Vue.js is a progressive JavaScript Framework for building reactive user interfaces.
Nasa Open APIs
Nasa offers Open APIs whose objective is to make Nasa data, including imagery, accessible to software developers. Learn more about Nasa Open APIs. In this lesson, we are going to see how we can consume one of the Nasa API called APOD (Astronomy Picture of the Day). Now that we have an overview of what Nasa Open APIs are, let us start learning how to consume the APIs using the Vue.js framework.
We are going to create an HTML file called index.html and make sure it has the following code:
<!doctype html>
<html lang="en">
<head>
    <!-- Required meta tags -->
    <meta charset="utf-8">
    <meta name="viewport" content="width=device-width, initial-scale=1, shrink-to-fit=no">

    <!-- Bootstrap CSS -->
    <link rel="stylesheet" href="https://stackpath.bootstrapcdn.com/bootstrap/4.4.1/css/bootstrap.min.css" integrity="sha384-Vkoo8x4CGsO3+Hhxv8T/Q5PaXtkKtu6ug5TOeNV6gBiFeWPGFN9MuhOf23Q9Ifjh" crossorigin="anonymous">

    <title>HLAB - Learning Vue.js</title>
</head>
<body>

<div class="container">
    <div class="row">
        <div class="col-12">


        </div>
    </div>
</div>


<!-- Vue js JavaScript -->


</body>
</html>
In the above code, we have just created an HTML file but have also included the Bootstrap 4 css file for styling. The next step we are going to pull in Vue.js development version and Axios.js in our file. Learn more about Vue.js framework getting started and Axios.js getting started. The next step is to make sure your index.html has the following code:
<!doctype html>
<html lang="en">
<head>
    <!-- Required meta tags -->
    <meta charset="utf-8">
    <meta name="viewport" content="width=device-width, initial-scale=1, shrink-to-fit=no">

    <!-- Bootstrap CSS -->
    <link rel="stylesheet" href="https://stackpath.bootstrapcdn.com/bootstrap/4.4.1/css/bootstrap.min.css" integrity="sha384-Vkoo8x4CGsO3+Hhxv8T/Q5PaXtkKtu6ug5TOeNV6gBiFeWPGFN9MuhOf23Q9Ifjh" crossorigin="anonymous">

    <title>HLAB - Learning Vue.js</title>
</head>
<body>

<div class="container">
    <div class="row">
        <div class="col-12">


        </div>
    </div>
</div>


<!-- Vue js JavaScript -->
<script src="https://cdn.jsdelivr.net/npm/vue/dist/vue.js"></script>

<!-- Axios js JavaScript -->
<script src="https://cdn.jsdelivr.net/npm/axios/dist/axios.min.js"></script>


</body>
</html>
On line 27, we have added vue.js script and on line 30 we have added axios.js script.
Nasa APOD API: Astronomy Picture of the Day
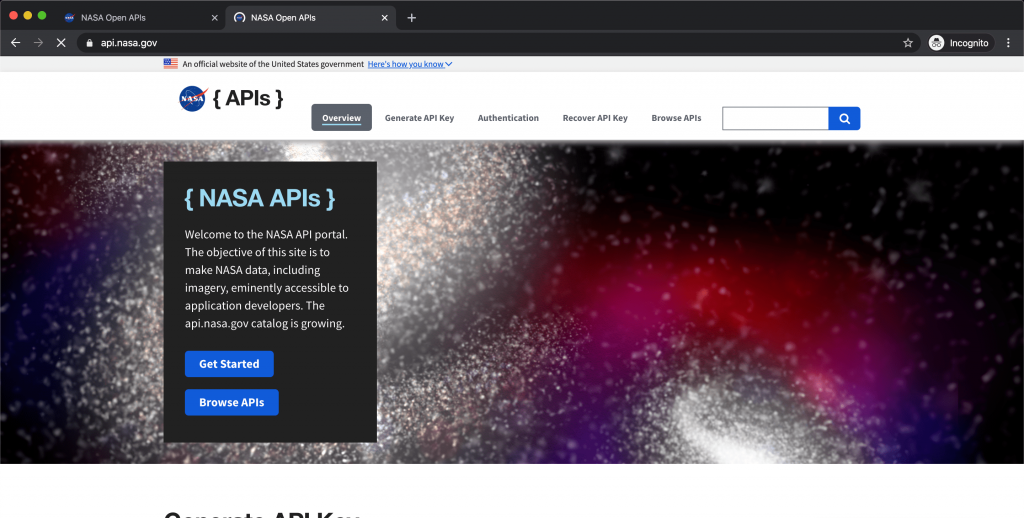
APOD is one of the most popular websites at NASA, which is the Astronomy Picture of the day. In this lesson, we are going to learn how to consume this API. Now visit Nasa Open APIs website and you will see the following screen:
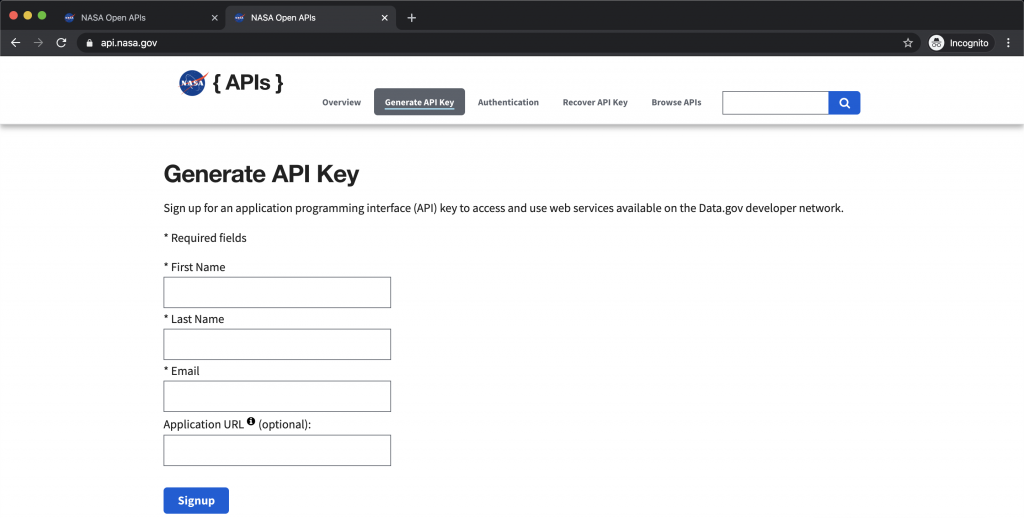
The next step we are going to do is to sign for an API key, click on Generate API key and fill the following form:
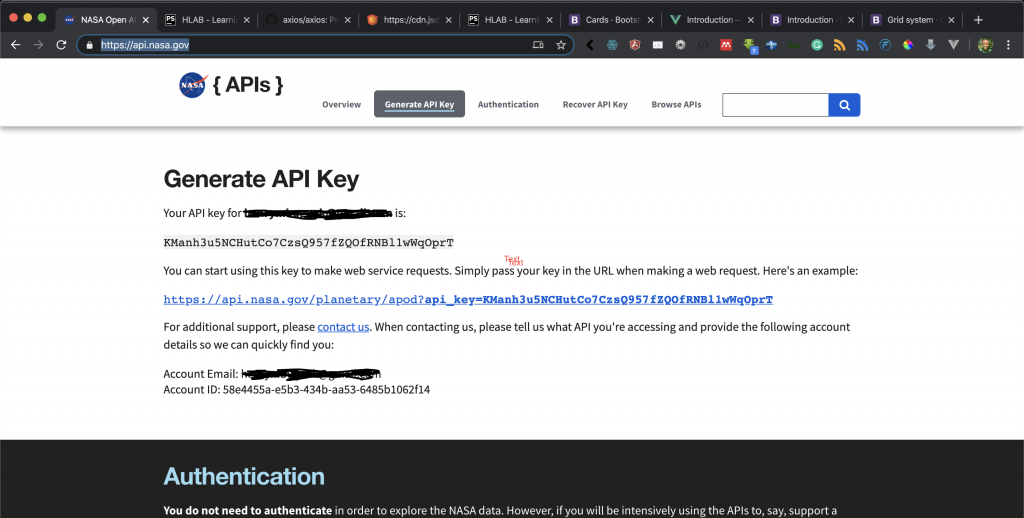
Once you are done filling the form, hit sign up button and you should get the API key as seen below:
Now that we have the API key, click on the Browse APIs and you get the following screen:
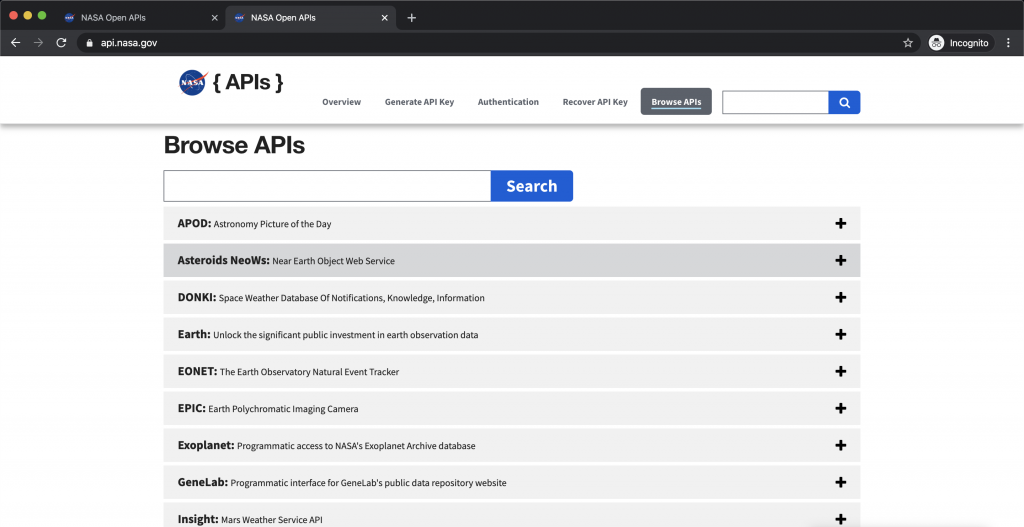
You will find a list of APIs, click on the first one called APOD: you get the following screen:
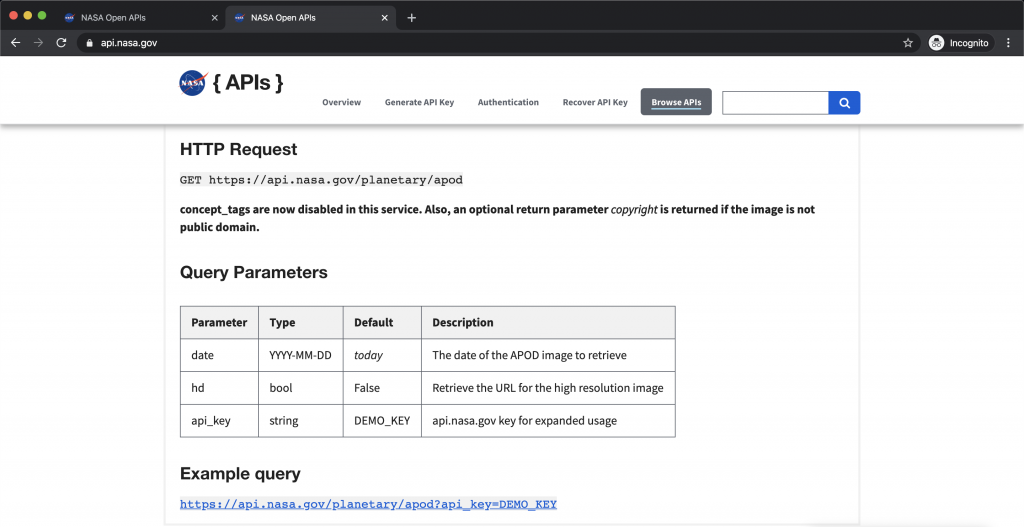
From the above screen, we are given an example of how to create an HTTP request. So that we see the kind of response we get, I am going to launch postman hit the following URL:
https://api.nasa.gov/planetary/apod?api_key=KManh3u5NCHutCo7CzsQ957fZQOfRNBl1wWqOprT
Remember to replace the key above with your key. Here is the response from Nasa:
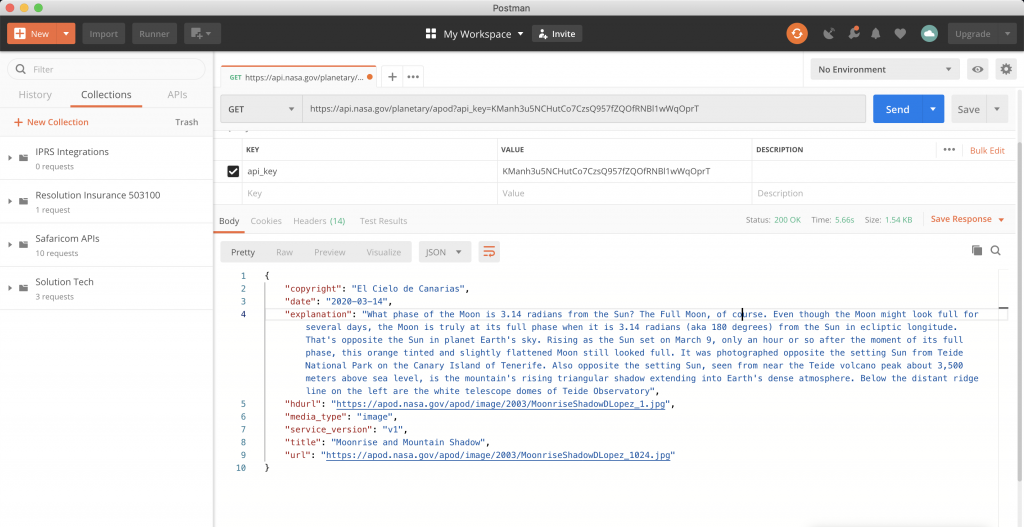
From the above response, we can tell the type of data we are getting and now we are ready to go back to our index.html and start implementing our vue.js instance. Make sure that your index.html has the following code:
<!doctype html>
<html lang="en">
<head>
    <!-- Required meta tags -->
    <meta charset="utf-8">
    <meta name="viewport" content="width=device-width, initial-scale=1, shrink-to-fit=no">

    <!-- Bootstrap CSS -->
    <link rel="stylesheet" href="https://stackpath.bootstrapcdn.com/bootstrap/4.4.1/css/bootstrap.min.css" integrity="sha384-Vkoo8x4CGsO3+Hhxv8T/Q5PaXtkKtu6ug5TOeNV6gBiFeWPGFN9MuhOf23Q9Ifjh" crossorigin="anonymous">

    <title>HLAB - Learning Vue.js</title>
</head>
<body>

<div id="app">
    <div class="container">
        <div class="row">
            <div class="col-12">
                <div class="mt-5">
                    <div class="card" style="width: 50rem;">
                        <h5 class="card-title">NASA APOD: Astronomy Picture of the Day</h5>
                        <img :src="imgSrc" class="card-img-top" :alt="imgTitle" height="300" width="50">
                        <div class="card-body">
                            <h5 class="card-title">{{ imgTitle }}</h5>
                            <p class="card-text">{{ imgExplanation }}</p>
                            <a :href="imgSrc" target="_blank" class="btn btn-primary">View Image</a>
                        </div>
                    </div>
                </div>

            </div>
        </div>
    </div>
</div>


<!-- Vue js JavaScript -->
<script src="https://cdn.jsdelivr.net/npm/vue/dist/vue.js"></script>

<!-- Axios js JavaScript -->
<script src="https://cdn.jsdelivr.net/npm/axios/dist/axios.min.js"></script>


<!-- Vue js Instance and Axios Request -->
<script>
    var nasaApiKey = 'KManh3u5NCHutCo7CzsQ957fZQOfRNBl1wWqOprT';

    var url = 'https://api.nasa.gov/planetary/apod?api_key=' + nasaApiKey;


    var vm = new Vue({
        el: '#app',
        data: {
            imgSrc: '',
            imgTitle: '',
            imgExplanation: '',
            imgDate: '',
            imgUrl: '',

        },
    });

    axios.get(url).then(function (response) {
        vm.imgSrc = response.data.url;
        vm.imgTitle = response.data.title;
        vm.imgExplanation = response.data.explanation;
        vm.imgDate = response.data.date;
    })
</script>

</body>
</html>
Now let us understand the code we have added in this file:
- From line 46 to line 70 – we have created a JavaScript section.
- Line 47 – we create a variable called nasaApiKey and we pass our Nasa api key.
- Line 49 – we define the URL variable and we pass NASA APOD api and concatenate with our Nasa API key.
- From lines 52 to 62 – we a variable called vm which we assign a Vue instance.
- Line 53 – we define a DOM element whose id is app. A Vue app attaches itself to a single DOM element (#app in our case) then full controls.
- Line 54 to line 61 – we define our data that we are going to our DOM element.
- Line 55 – we create an empty image source using imgSrc.
- Line 56 – we create an empty image title using imgTitle.
- Line 57 – we create an empty image explanation using imgExplanation.
- Line 58 –we create an empty image date using imgDate.
- Line 59 – we create an image url source using imgUrl.
- Line 64 to line 69 – we initial a get request call to Nasa APOD API using Axios.
- Line 65 – we assign an image URL from our Axios request to our Vue instance imgSrc.
- Line 66 – we assign an image title from our Axios request to our Vue instance imgTitle.
- Line 77 – we assign an image explanation from Axios request to our Vue instance imgExplanation.
- Line 78 – we assign an image date from Axios request to our Vue instance imgDate.
- Line 15 to 34 – the next step is to display the data we get from Nasa APOD api in our browser. We define our div element with the id app on line 15 where our vue.js instance will attach itself.
- From lines 20 to 28 – we define a bootstrap card.
- Line 21 – we define our card title.
- Line 22 – we define our image source by using :src=” imgSrc” which is a shorthand for v-bind in Vue js. Also in :alt=” imgTitle” we use a shorthand of v-bind to pass our imgTitle from our data in Vue instance.
- Line 24 – we use double curl braces and pass our imgTitle from data in Vue instance.
- Line 25 – we use double curl braces and pass our imgExplanation from our data in Vue instance.
- Line 26 – we pass imgSrc to href attribute using the shorthand of v-bind.
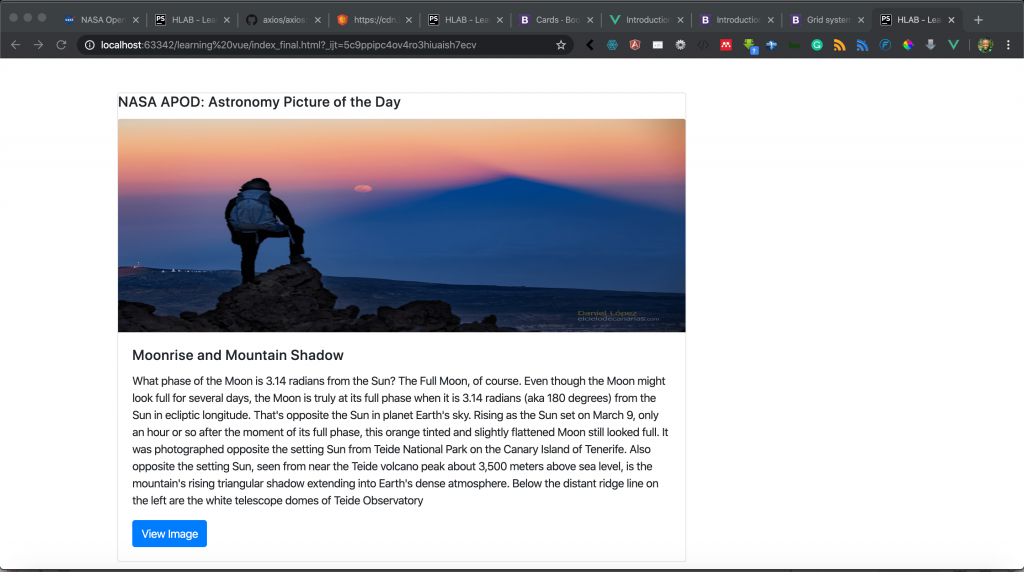
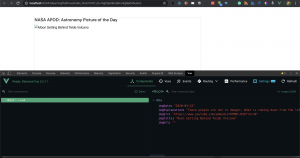
Phew! That was a lot of work, now it’s time to test our code. Open this file on your browser e.g. chrome and you should get the following output.
Goal Achieved in This Lesson
In this lesson, we have achieved the following:
- We have learned how to generate the Nasa API key.
- We have learned how we can create a Vue js instance.
- We have learned how we can initiate HTTP get request using Axios.
- We have learned how we can display Nasa APOD data in our browser using Vue.
What we have done is okay for a simple task but in our next lesson, we will take look at a more structured approach to integrate the Nasa API data with our Vue app. Continue learning in Lesson 2.

Facebook Comments