Hello and welcome to this PHP/Laravel tutorial series, my name is Henry Mbugua and I will be taking you through the various aspects and new answers of how to build an automated workflow of sending emails in Laravel 6.5. We will also learn how we can generate a pdf document using DOMPDF wrapper for Laravel.
Business Use Cases
While much of the system we create aim to respond to explicit triggers or user’s events, background process performed at regular intervals are just as essentials. The following are two sample business cases where scheduling tasks in your application is important:
a). Management Reports – Let’s assume that you work for an organization where top management like CEO or Managing director requires weekly reports of how the sales department is onboarding new business or retaining old business. IT department can create a weekly Sales Report task and send the report via email.
b). Nurture Leads – The sales department can request the IT department to create a task that sends emails to new customers where there is an opportunity for closing a business deal based on certain criteria.
Creating New Laravel Application
Now that we understand why we might need a scheduler in a real-world business problem. We are going to create a new Laravel application. One thing to note is that Laravel 6 requires you to have PHP >= 7.2.0. To create my project, I am going to run the following command:
composer create-project --prefer-dist laravel/laravel communication
The above command will create a new Laravel project inside a folder called communication. Once it’s done, we can verify which version of Laravel we are using by running the following command:
php artisan --version

Now that we have a Laravel 6.5 project created, we are going to install Laravel-dompdf in our project using the following command:
composer require barryvdh/laravel-dompdf
The above package will help in generating a pdf document in our Laravel application. Learn more about Laravel-dompdf.
Once you have run that command successfully, it’s time to start developing our task scheduler in Laravel.
Laravel 6.5 Authentication
In this tutorial, we are going to use registered users’ emails to send the emails and this would require us to have some type of authentication in our newly created Laravel application. Luckily, Laravel ships with a powerful authentication pre-built system to get you started. In fact, almost everything is configured out of the box and to make things even sweeter, Laravel 6 authentication uses Vue js. Learn more about Laravel 6 Authentication.
The next step is to install Laravel/ui by running the following command:
composer require laravel/ui --dev
Here is the terminal output of the above command:

Now that we have the Laravel/ui package installed in our project, we now have a quick way to scaffold all of the routes and views we need for authentication using the following command:
php artisan ui vue --auth
Here is my terminal output:

The scaffold has been created successfully, from the terminal output, Laravel asks me to run “npm install && npm run dev” to compile our fresh scaffold. Npm is a package manager for JavaScript programming language. When you run the following command:
npm install && npm run dev
You might get an error: command not found. To solve that problem, you will need to install node on your machine. You can get node js from here. Once you install node, npm command will be available. After running npm install && npm run dev command, I get the following output on my terminal:

From my terminal, I can tell that my assets (app.css and app.js) have been compiled successfully. The next step we need to do is to configure our database connection in the .env file. Ensure you have configured your database connection.
Registering A Couple of Users
Before we can register in our application, we need to run the migration. By default, Laravel comes with the App\User model in our app directory. To run the migration, use the following command:
php artisan migrate
Here is the output of my terminal:

To register a user, spin up Laravel development server by using the following command:
php artisan serve
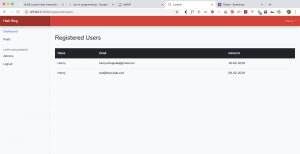
On your browser, navigate to http://127.0.0.1:8000/register and register more than one user. Here is a screenshot of the register page.
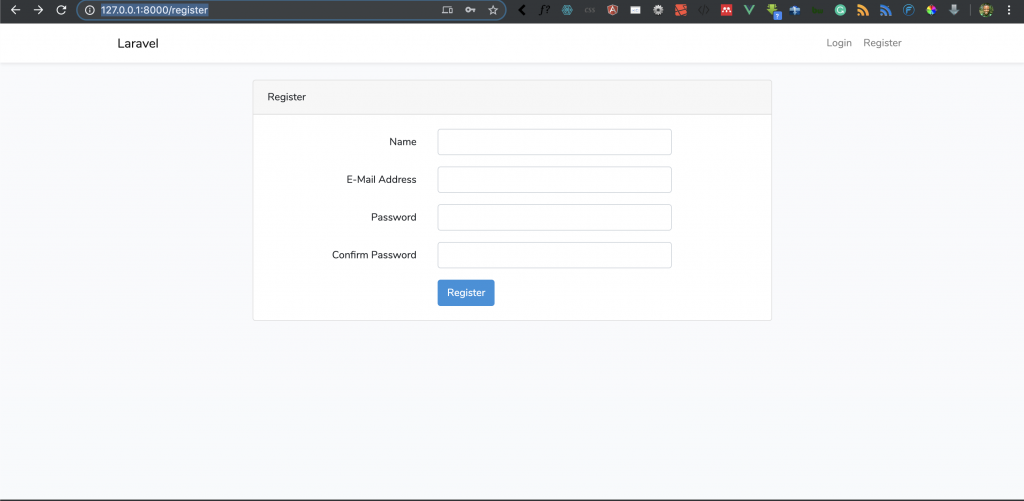
Once you register a couple of users, we are now ready to create our task scheduler.
Creating Laravel Task Scheduling
In order for us to define our task scheduled task, open App\Console\Kernel.php file and make sure it has the following code:
<?php

namespace App\Console;

use App\User;
use Illuminate\Console\Scheduling\Schedule;
use Illuminate\Foundation\Console\Kernel as ConsoleKernel;
use Illuminate\Support\Facades\Mail;
use PDF;

class Kernel extends ConsoleKernel
{
    /**
     * The Artisan commands provided by your application.
     *
     * @var array
     */
    protected $commands = [
        //
    ];

    /**
     * Define the application's command schedule.
     *
     * @param  \Illuminate\Console\Scheduling\Schedule  $schedule
     * @return void
     */
    protected function schedule(Schedule $schedule)
    {
        $schedule->call(function (){
            $users = User::orderBy('created_at', 'ASC')->get();

            foreach ($users as $user) {

                $sales_report = PDF::loadView('reports.sale_report', ['user' => $user]);
                $pdf = $sales_report->output();
                $data = [
                    'details' => 'This email is to notify you of this week sales and challenges we are facing as Sales department',
                    'manager_name' => $user->name
                ];

                Mail::send('reports.email_body', $data, function ($message) use ($user, $pdf) {
                   $message->subject('HLAB Weekl Sales Report');
                   $message->from('hlab@gmail.com');
                   $message->to($user->email);
                   $message->attachData($pdf, 'sales.pdf', [
                       'mime' => 'application/pdf',
                   ]);
                });


            }


        });
    }

    /**
     * Register the commands for the application.
     *
     * @return void
     */
    protected function commands()
    {
        $this->load(__DIR__.'/Commands');

        require base_path('routes/console.php');
    }
}
Now let’s understand the code in this file,
- Line 5 – we import the User model.
- Line 9 – we import PDF, which is a façade we are yet to create. If you recall at the beginning of the tutorial we installed Laravel-dompdf. We will create the façade in a moment.
- Line 30 to 56 – we define our schedule method.
- Line 31 – we get a list of all users from our user model.
- Line 33 to 52 – we create a foreach loop so that we can loop through all the users.
- Line 35 – we create a variable called sales_report and we use PDF::loadView to pass our Laravel view called sale_report. We also pass user data to that view.
- Line 36 – we generate the pdf view by using the output () method from Laravel-dompdf.
- Line 37 to 40 – we define a normal array which I want to pass into my email
- Line 42 to 49 – we define our mail method to send email
- Line 42 – we use a view called email_body, we pass our data array and we define what to use by passing $user and $pdf.
- Line 43 – we define the subject of the email.
- Line 44 – we define who is sending the email by passing the sender email.
- Line 45 – we define where the email is going to. We get the email from the user variable.
- Line 46 – we attach our generated pdf, we give the pdf a name of sales.pdf.
- Line 47 – we define that mime-type is pdf.
The next step is to update the config/app.php file by adding
Barryvdh\DomPDF\ServiceProvider::class
In the provider’s array and by adding
'PDF' => Barryvdh\DomPDF\Facade::class,
in the aliases array.
In our view folder, I have created a folder called reports, inside that folder, we have email_body.blade.php file and sale_report.blade.php file. Ensure that email_body.blade.php has the following code:
<!doctype html>
<html lang="en">
<head>
    <meta charset="UTF-8">
    <meta name="viewport"
          content="width=device-width, user-scalable=no, initial-scale=1.0, maximum-scale=1.0, minimum-scale=1.0">
    <meta http-equiv="X-UA-Compatible" content="ie=edge">
    <title>HLAB Weekly Sales Reports</title>
</head>
<body>

<p><b>Dear {{ $manager_name }}</b></p>

<p>{{ $details }}</p>

</body>
</html>
The above file is just a normal Html file and we pass variables from our Kernel.php method.
The next step is to ensure that sale_report.blade.php has the following code. This file is what generate as pdf file.
<!DOCTYPE html>
<html lang="en">
<head>
    <meta charset="utf-8">
    <meta http-equiv="X-UA-Compatible" content="IE=edge">
    <meta name="viewport" content="width=device-width, initial-scale=1">
    <meta http-equiv="Content-Type" content="text/html; charset=utf-8"/>

    <!-- The above 3 meta tags *must* come first in the head; any other head content must come *after* these tags -->
    <title>HLAB TECH </title>

    <style>
        @page {
            margin: 0px;
        }

        body {
            font-size: 12px;
            margin: 0px;
            font-family: sans-serif;
        }

        div .inline {
            color: black;
            float: left;
            line-height: 1;
            font-size: 13px;
        }

        .row {
            width: 100%;
        }

        div .row:after {
            clear: both;
            width: 100%;
        }

        .report-title {
            float: left;
            font-size: 1.3em;
            font-weight: 100;
            font-family: sans-serif;
            text-align: center;
            width: 100%;
        }

        .right {
            float: right;
        }

        .header {
            font-size: 12px;
            color: #aaa;
            line-height: 1.5;
        }

        table {
            width: 100%;
            border-collapse: collapse;
        }

        td {
            margin: 0;
            border: none;
            padding: 5px;
            text-align: left;
            font-size: 12px;
            border-bottom: #ddd 1px solid;
            border-right: #ddd 1px solid;
            border-top: #ddd 1px solid;
            border-left: #ddd 1px solid;
        }

        tr {
            border-bottom: #ddd 10px solid;
            width: 100%;
        }

        th {
            padding: 3px;
            background: #eee;
            border-bottom: 1px solid #eee;
            font-size: 9px;
            font-weight: bold;
            color: black;
        }

        td a {
            text-decoration: none;
            color: black;
        }

        .summary-table {
            width: 30%;
            margin-bottom: 20px;
            color: black
        }

        .summary-table tr {
            CreditAdministrationReplacementsReport border-bottom: #eee 0.5pt solid;
            border-top: #eee 0.5pt solid
        }

        .key {
            padding: 10px;
            font-weight: bold;
            background: #eee
        }

        .value {
            padding: 10px;
            text-align: center;
        }

        .col-md-6 {
            width: 50%;
        }

        .col-md-2 {
            width: 20%;
        }
    </style>

    @yield('styles')
</head>
<body>


<div style="margin-top: 20px; width: 100%; text-align:center;">

    <img style="width: 180px;"
         src="https://www.blog.hlab.tech/wp-content/uploads/2018/10/cropped-hLTec-1-32x32.png"
         {{--         src="{{asset('backend/img/rcl_logo_inverted.png')}}"--}}
         alt="rcl logo">
    <div style="width: 100%; clear: both;">
    </div>

</div>


<div style="width: 100%; padding: 20px">
    <table>
        <tr>
            <th>Company</th>
            <th>Contact</th>
            <th>Country</th>
        </tr>
        <tr>
            <td>Alfreds Futterkiste</td>
            <td>Maria Anders</td>
            <td>Germany</td>
        </tr>
        <tr>
            <td>Centro comercial Moctezuma</td>
            <td>Francisco Chang</td>
            <td>Mexico</td>
        </tr>
        <tr>
            <td>Ernst Handel</td>
            <td>Roland Mendel</td>
            <td>Austria</td>
        </tr>
        <tr>
            <td>Island Trading</td>
            <td>Helen Bennett</td>
            <td>UK</td>
        </tr>
        <tr>
            <td>Laughing Bacchus Winecellars</td>
            <td>Yoshi Tannamuri</td>
            <td>Canada</td>
        </tr>
        <tr>
            <td>Magazzini Alimentari Riuniti</td>
            <td>Giovanni Rovelli</td>
            <td>Italy</td>
        </tr>
    </table>
</div>

<div style="width: 100%; clear: both;">
</div>

<footer
        style="position: absolute;
    bottom: 0;
    width: 100%;
    text-align: center;
    background-color: #020066;
    padding: 10px;
    color:#FFF;
    line-height: 1.6;">

    <p>
        HLAB TECH
    </p>

    {{--<p>--}}
    {{--© {{\Carbon\Carbon::today()->format('Y')}}--}}
    {{--Resolution Credit Limited--}}
    {{--</p>--}}
</footer>

</body>
</html>
The above code is just a normal Html file.
The next step is to configure your Laravel email driver settings in the .env file.
MAIL_DRIVER=smtp
MAIL_HOST=smtp.gmail.com
MAIL_PORT=587
MAIL_USERNAME=test@gmail.com
MAIL_PASSWORD=qdgmyxlobgwbxvot45456t
MAIL_ENCRYPTION=tls
Once you have configured your email, it’s time to test our code. On your terminal run the following command:
php artisan schedule:run
Here is the output of my terminal:

From my terminal, I can tell that the command was successful. The next step is to log in to the email of my registered user in this application and see if we have an email.
When I log in to my email, I have received email from my application here is a screenshot:

In the email, I can see the email has a pdf attachment. When I open the email, I see the following content.
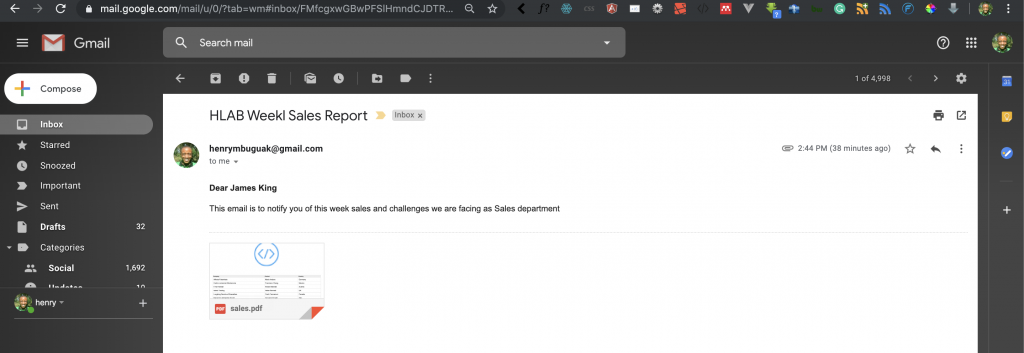
Awesome you can click and download the pdf.
Now a real-world application, let’s say you have hosted your application in Ubuntu server, you can Cron entries to your server and pass a command that calls php artisan schedule:run command in your application e.g.
* * * * * cd /path-to-your-project && php artisan schedule:run >> /dev/null 2>&1
Goal Achieved in this lesson
In this lesson, we have achieved the following:
- We have learned a little bit about Laravel 6 default authentication.
- We have learned about how to use Laravel-DOMPDF.
- We have learned how to create a schedule in our Kernel
- We have learned how to test our schedule.
To get the code associated with this lesson visit PHP/Laravel Task Scheduler.

Facebook Comments