Hello and welcome to this Python/Django tutorial series, my name is Henry Mbugua and I will be taking you through the various aspects and new answers of monitoring applications that help all software development teams to discover and prioritize errors in real-time using Sentry.
Application Error Problem Statement
Most software developers rely mostly on error logs that are produced by an application during development. Sometimes, developers use the written unit test to analyze the state of the written code but with modern software development practices, relying on logs only does not cut it, especially in applications that are already in production.
For mobile applications, if users happen to find an error in your app, they will just uninstall the application and give you a bad rating on the app store. Too many applications still rely on outdated methods to find errors, and still must be parsed by eye which makes it hard to fix the bug and more time is wasted digging around in the logs and relying on users to report issues. There is a better way.
Monitoring Django Application Using Sentry
Error monitoring tools are an essential part of the modern dev toolkit. Resolving problems before they are even reported is the next iteration for quality software development. In this lesson, we are going to use Sentry, one of the many automated tools available.
If you are ready to take error monitoring for a spin, sign up for an account on sentry here. Here is a screenshot of the sentry sign up page.
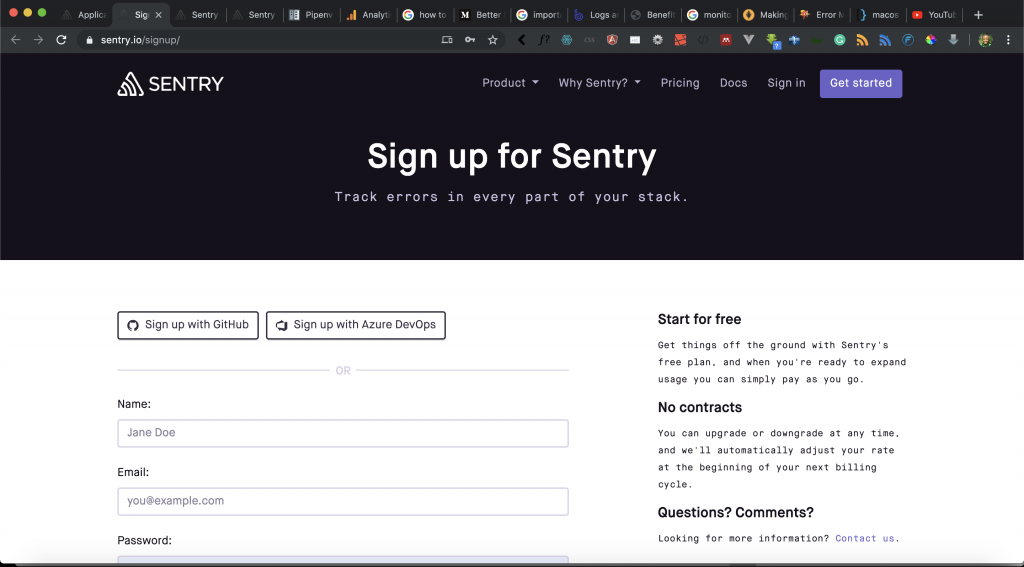
Sentry gives you different options to sign up, you can use Github account, Azure DevOps account or you can just fill-up the form. If you already have an account, you can log in to the sentry here. I already have an account and here is a screenshot of my sentry dashboard.
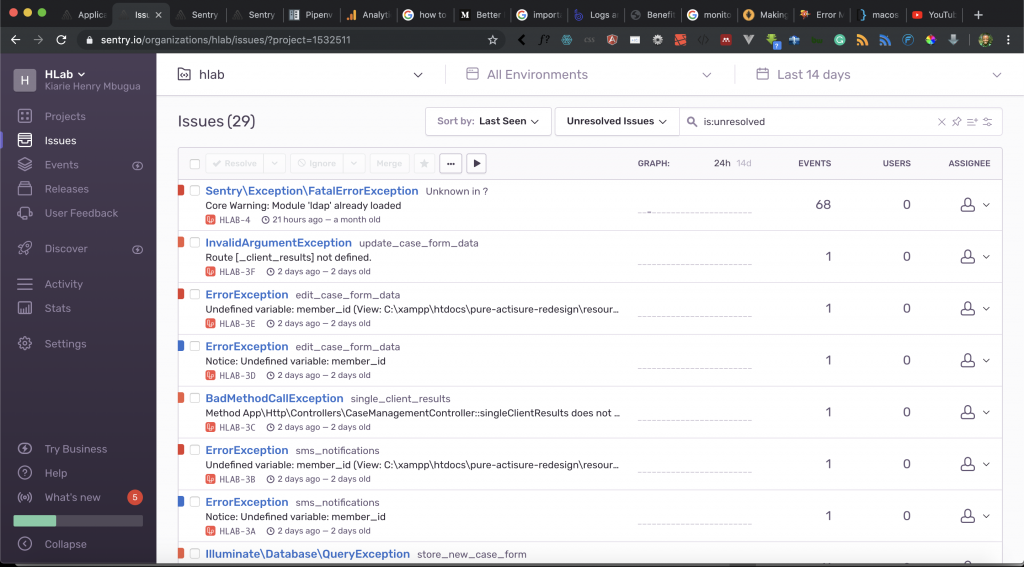
For the sake of this tutorial, we are going to create a new project on the sentry dashboard. On the left side navbar, click on Projects link. You will see the following screenshot:
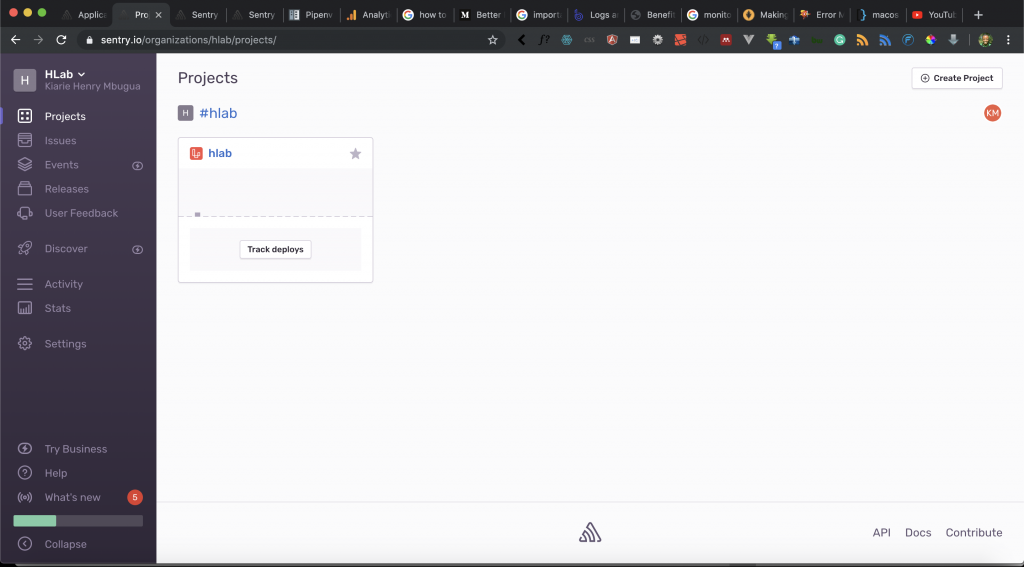
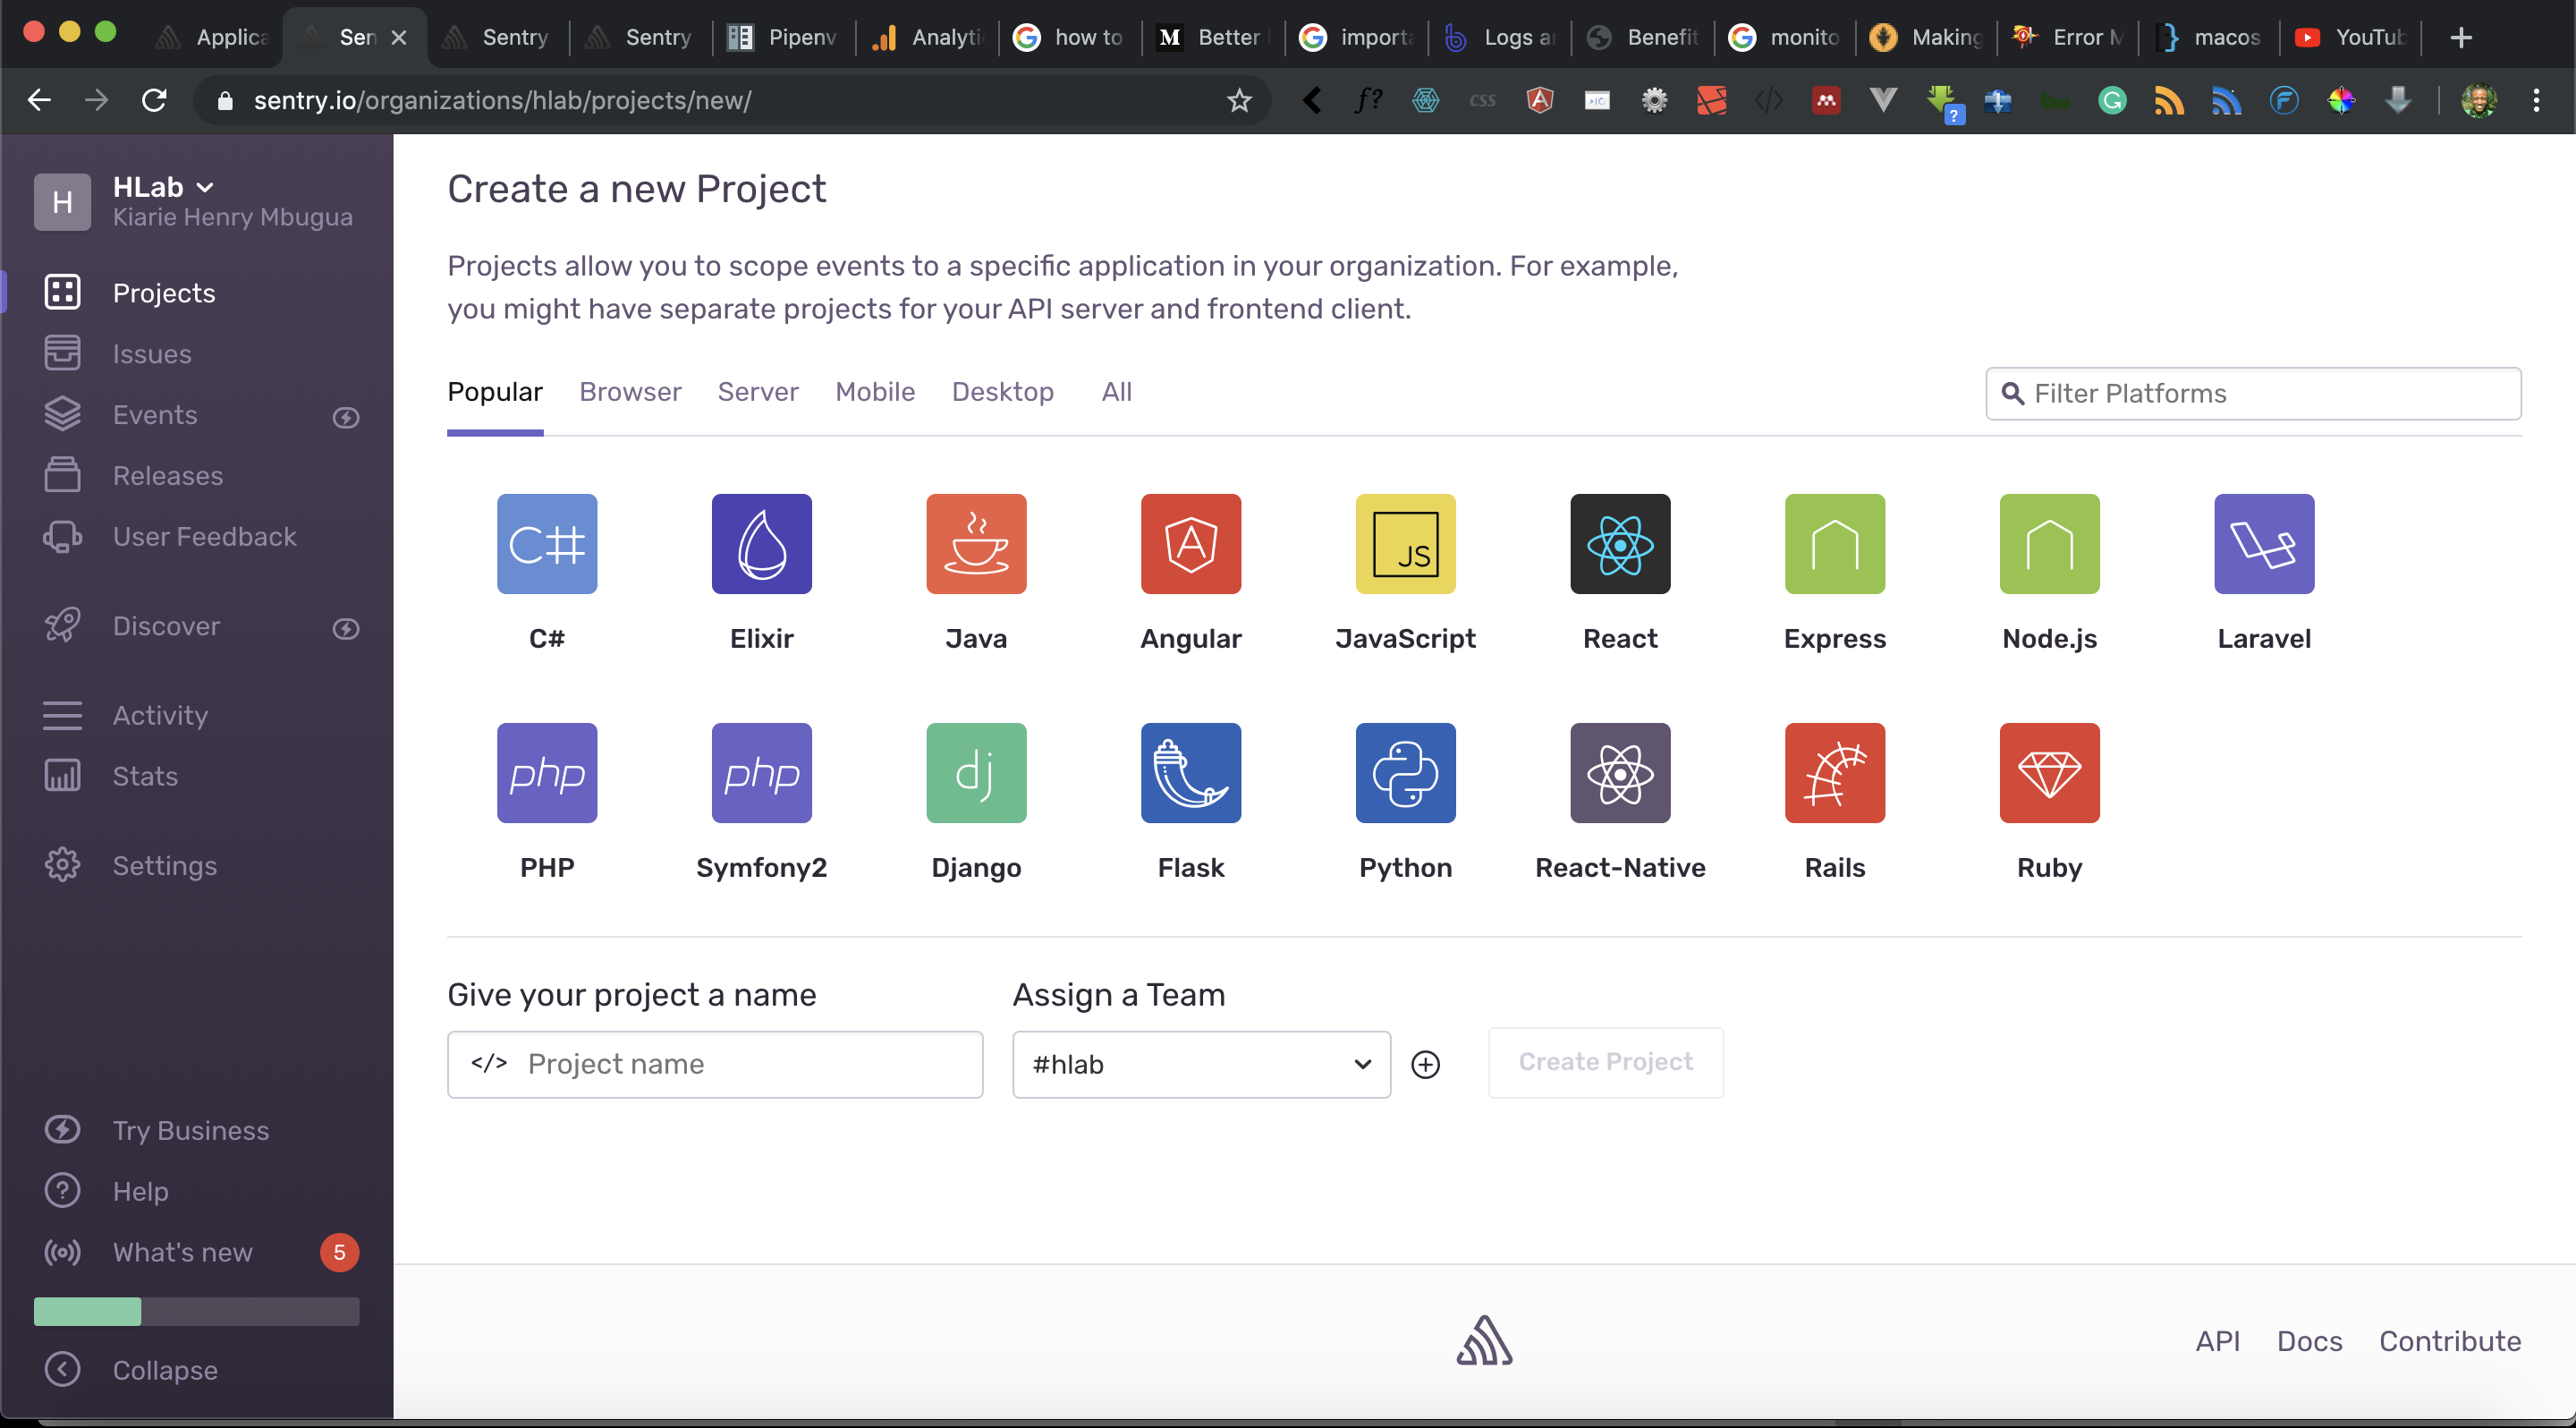
At the top right corner, click Create Project. You will get the following screenshot:
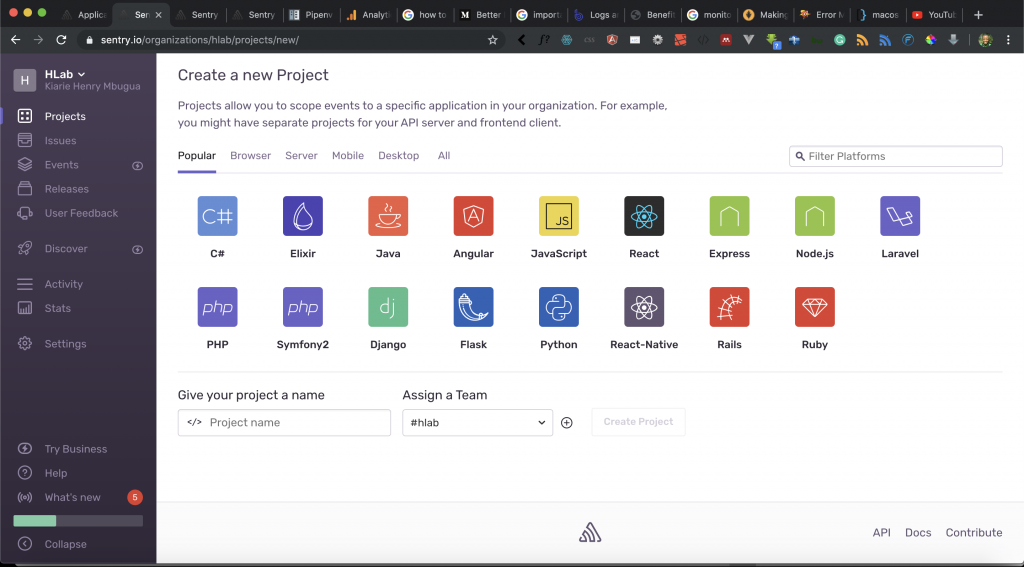
Sentry gives the ability to select what type of project you are dealing with, in this case, we are dealing with the Django application. I have selected Django and named my project Mpesa API and all I have to do is to hit the Create Project button. After Sentry has successfully created my project, I am taken to the following page where I get a quick start guide. Here is a screenshot:
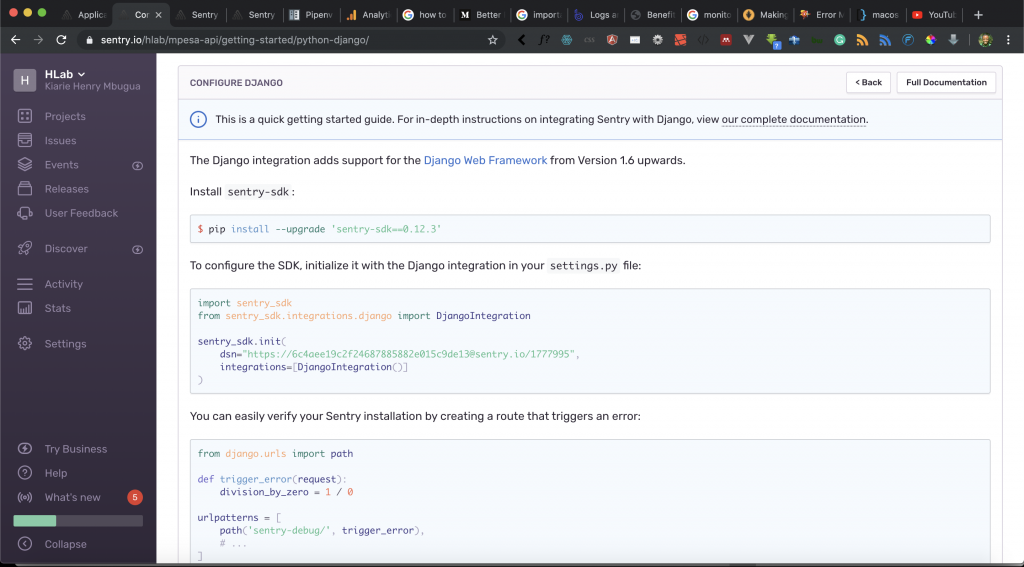
Awesome, now that we have our project created. The next step is to configure our Django Application to use Sentry.
Configuring Django Application to Use Sentry
In this tutorial, we are assuming that you have a Django application ready, in my case, I will be using the Mpesa-Api project which is one of the tutorial series at the Hlab blog. Open your Django project in your favorite IDE.
Step 1:
We are going to install sentry-SDK in our python virtual environment or where your Django project is running on (your python environment). Open your terminal and run the following command:
pip install --upgrade 'sentry-sdk==0.12.3'
Here is my terminal output after running the above command:

From the terminal, we are able to tell that sentry has been successfully Installed. The next step is to edit our Django settings.py file and make sure it has the following code:
"""
Django settings for mysite project.
Generated by 'django-admin startproject' using Django 2.2.4.
For more information on this file, see
https://docs.djangoproject.com/en/2.2/topics/settings/
For the full list of settings and their values, see
https://docs.djangoproject.com/en/2.2/ref/settings/
"""
import os
# Build paths inside the project like this: os.path.join(BASE_DIR, ...)
BASE_DIR = os.path.dirname(os.path.dirname(os.path.abspath(__file__)))
# Quick-start development settings - unsuitable for production
# See https://docs.djangoproject.com/en/2.2/howto/deployment/checklist/
# SECURITY WARNING: keep the secret key used in production secret!
SECRET_KEY = 'nl9&eqhh!092-vf*5#vrp8p8n=5^35=$0+8b&wh-sh&lino'
# SECURITY WARNING: don't run with debug turned on in production!
DEBUG = True
ALLOWED_HOSTS = ['91563395.ngrok.io', '127.0.0.1', 'localhost']
# Application definition
INSTALLED_APPS = [
'mpesa_api.apps.MpesaApiConfig',
'django.contrib.admin',
'django.contrib.auth',
'django.contrib.contenttypes',
'django.contrib.sessions',
'django.contrib.messages',
'django.contrib.staticfiles',
]
MIDDLEWARE = [
'django.middleware.security.SecurityMiddleware',
'django.contrib.sessions.middleware.SessionMiddleware',
'django.middleware.common.CommonMiddleware',
'django.middleware.csrf.CsrfViewMiddleware',
'django.contrib.auth.middleware.AuthenticationMiddleware',
'django.contrib.messages.middleware.MessageMiddleware',
'django.middleware.clickjacking.XFrameOptionsMiddleware',
]
ROOT_URLCONF = 'mysite.urls'
TEMPLATES = [
{
'BACKEND': 'django.template.backends.django.DjangoTemplates',
'DIRS': [],
'APP_DIRS': True,
'OPTIONS': {
'context_processors': [
'django.template.context_processors.debug',
'django.template.context_processors.request',
'django.contrib.auth.context_processors.auth',
'django.contrib.messages.context_processors.messages',
],
},
},
]
WSGI_APPLICATION = 'mysite.wsgi.application'
# Database
# https://docs.djangoproject.com/en/2.2/ref/settings/#databases
DATABASES = {
'default': {
'ENGINE': 'django.db.backends.sqlite3',
'NAME': os.path.join(BASE_DIR, 'db.sqlite3'),
}
}
# Password validation
# https://docs.djangoproject.com/en/2.2/ref/settings/#auth-password-validators
AUTH_PASSWORD_VALIDATORS = [
{
'NAME': 'django.contrib.auth.password_validation.UserAttributeSimilarityValidator',
},
{
'NAME': 'django.contrib.auth.password_validation.MinimumLengthValidator',
},
{
'NAME': 'django.contrib.auth.password_validation.CommonPasswordValidator',
},
{
'NAME': 'django.contrib.auth.password_validation.NumericPasswordValidator',
},
]
# Internationalization
# https://docs.djangoproject.com/en/2.2/topics/i18n/
LANGUAGE_CODE = 'en-us'
TIME_ZONE = 'UTC'
USE_I18N = True
USE_L10N = True
USE_TZ = True
# Static files (CSS, JavaScript, Images)
# https://docs.djangoproject.com/en/2.2/howto/static-files/
STATIC_URL = '/static/'
import sentry_sdk
from sentry_sdk.integrations.django import DjangoIntegration
sentry_sdk.init(
dsn='https://6c4aee19c2f24687885882e015c9de13@sentry.io/1777995',
integrations=[DjangoIntegration()]
)
Let’s understand the code we have just added, at the bottom of our settings.py file, we have added the following:
- Line 124 – we import sentry SDK.
- Line 125 – we import the DjangoIntegration module from sentry SDK.
- Line 127 to 130 – we initialize our integration to the sentry web portal or dashboard.
- Line 128 – we define a variable called dsn and this is where we pass our sentry URL created for our project. This URL is unique for every project created on sentry.
- Line 129 – we define a variable called integrations and we pass the DjangoIntegration module that we imported from the sentry.
The next step is to verify that our sentry installation is working by creating a route that triggers an error:
Open the main django urls.py file and add the following code:
from django.contrib import admin
from django.urls import path, include


def trigger_error(request):
    division_by_zero = 300 / 0


urlpatterns = [
    path('api/v1/', include('mpesa_api.urls')),
    path('admin/', admin.site.urls),
    path('sentry-debug', trigger_error),
]
Let’s understand the code we have added:
- Line 5 to 6 – we define a method called trigger_error where we are trying to divide a number by zero. This should throw an error since mathematics principles do not allow this.
- Line 12 – we define a URL that calls that method.
The next step is to test this, make sure your development server is running by using the following command:
python manage.py runserver
On your browser navigate to http://127.0.0.1:8000/sentry-debug on your browser you will get the following error:
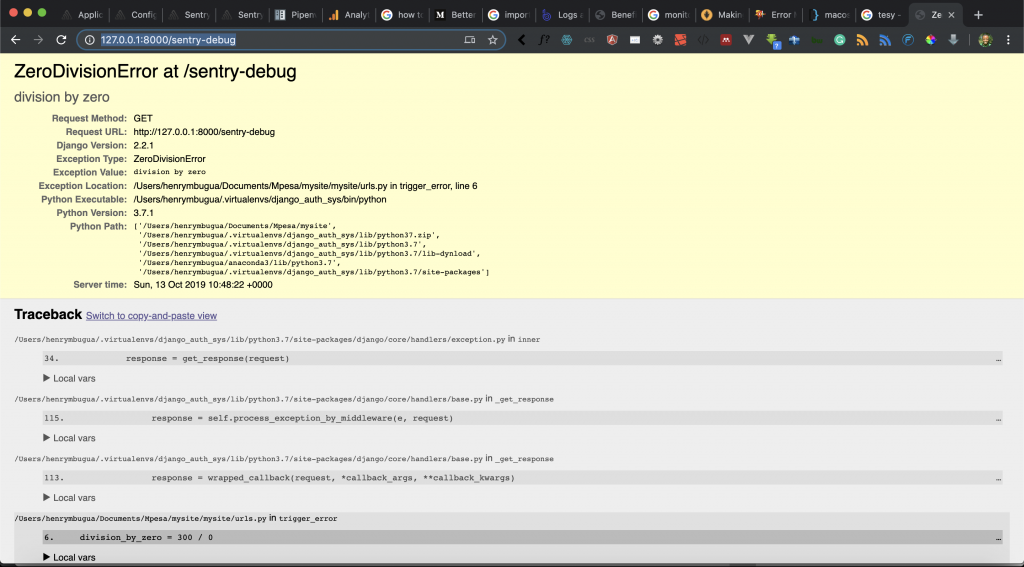
When you go back to the sentry dashboard you will see the following on the issues sections.
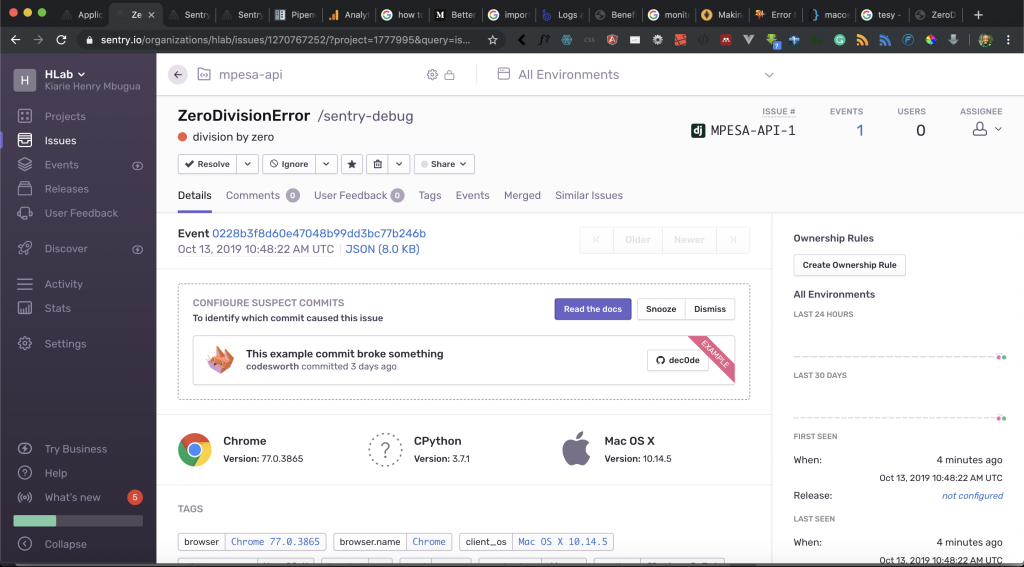
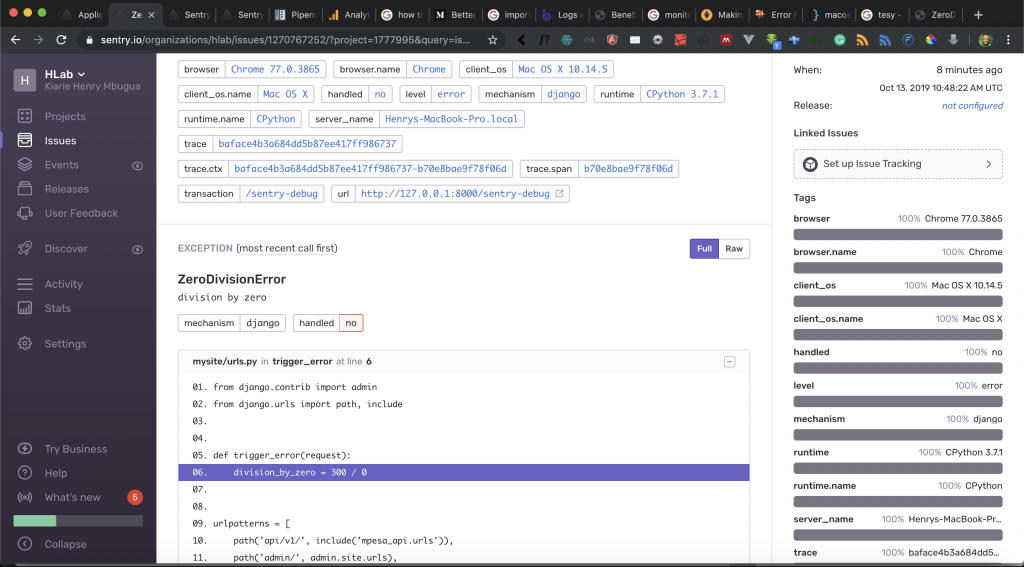
Sentry will give a comprehensive detail on the error encountered. Details like which browser, operating system, what time the error occurred, send an email for every error event, and which URL that was called. Sentry will even point you to the actual line that caused the error: Have a look at the following screenshot:
Task
Sentry offers very comprehensive documentation on how to fully leverage the platform. Learn more about sentry, “at best, users and logs provide clues. Sentry provides answers”.
Goal Achieved in This Lesson
The following are the goals achieved in this lesson:
- We have learned the reasons why we need an automated error monitoring tool.
- We have learned how to sign up and create a project on Sentry.
- We have learned how to configure the Django project to use Sentry.
Conclusion
In software development, application errors are inevitable but the ability to control the chaos around fixing software bugs can be management by proper error monitoring tools like Sentry. Software error logs are for auditing, the sentry is for real-time automation.


Facebook Comments