Hello and welcome to this Python 3.7 and Django 2.2 tutorial series, my name is Henry Mbugua and I will be taking you through the various aspect and new answer of how to use the Bootstrap front-end framework in Django, and register a user. In our previous tutorial, we learned how to set up a new Django project and this lesson continues from where we left.
Integrating Bootstrap in Django Web Framework
In this tutorial series, we are going to use Bootstrap 4 as our front-end framework. In order for us to use it, we need to download Bootstrap. Visit the Bootstrap website and click Download button, here is a screen shot of the download button.

I have chosen to download the compiled CSS and JS version. After your download is done, you will get a zipped folder in your download folder. The next step we need to do is to launch our Django project in our ide (Pycharm), each application we write in Django web framework consist of Python package that follows a certain convention and Django comes with a utility to help us generate basic directory structure of an app.
We are going to create an app called person_portfolio, for us to generate this app, make sure you are in the same directory as manage.py and type this command:
python manage.py startapp person_portfolio
The above command will create a directory called person_portfolio which is laid out like this:

The person_portfolio structure will house our authentication systems in this tutorial series. Learn more about creating Django Apps. The next step is to tell our Django project the person_portfolio app is installed. To include the app in our project, we need to add a reference to its configuration class in the INSTALLED_APPS settings. The PersonPortifolioConfig is in person_portfolio/apps.py file, so it’s dotted path is ‘person_portifolio.apps.PersonPortfolioConfig’. Edit the webbasedauth/settings.py file and add the dotted path to the INSTALLED_APPS settings. It will look like this:
INSTALLED_APPS = [
    'person_portfolio.apps.PersonPortfolioConfig',
    'django.contrib.admin',
    'django.contrib.auth',
    'django.contrib.contenttypes',
    'django.contrib.sessions',
    'django.contrib.messages',
    'django.contrib.staticfiles',
]
Now Django knows to include the person_portfolio app.
Templates and Static files
By default, Django will look for templates inside a folder called templates in the apps. The next step is to create templates and static folder inside our person_portfolio app. This should look like this:

We are going to extract the bootstrap files that we downloaded earlier in this tutorial and place the files in the static folder, this should look like this:

Now that we have included our static files, we need to start creating our templates. We are going to create a template called base.html which all other templates will extend from. Inside the templates folder, create a file called base.html and make sure it has the following code:
<!doctype html>
{% load static %}
<html lang="en">
  <head>
    <!-- Required meta tags -->
    <meta charset="utf-8">
    <meta name="viewport" content="width=device-width, initial-scale=1, shrink-to-fit=no">

    <!-- Bootstrap CSS -->
    <link rel="stylesheet" href="{% static 'css/bootstrap.min.css' %}" integrity="sha384-ggOyR0iXCbMQv3Xipma34MD+dH/1fQ784/j6cY/iJTQUOhcWr7x9JvoRxT2MZw1T" crossorigin="anonymous">

    <title>Django Authentication System - HLAB</title>
  </head>
  <body>
    {% block content %}

    {% endblock %}

    <!-- Optional JavaScript -->
    <!-- jQuery first, then Popper.js, then Bootstrap JS -->
    <script src="https://code.jquery.com/jquery-3.3.1.slim.min.js"></script>
    <script src="{% static 'js/bootstrap.bundle.min.js' %}"></script>
  </body>
</html>
Let’s understand the code in this file:
- This file contains normal HTML code.
- Line 2, we use Django load static tag which builds URL for the given relative path using the configured STATICFILES_STRORAGE.
- Line 10, we include our bootstrap css.
- Line 21. We include jQuery.
- Line 22, we include bootstrap js.
Using Django UserCreationForm
Django authentication provides a form named UserCreationForm which inherits from ModelForm class to handle the creation of new users. Open person_portfolio/views.py file and make sure it has the following code:
from django.shortcuts import render
from django.contrib.auth.forms import UserCreationForm
from django.contrib.auth import login, authenticate
from django.http import HttpResponse


def sign_up(request):
    if request.method == 'POST':
        form = UserCreationForm(request.POST)
        if form.is_valid():
            form.save()
            username = form.cleaned_data.get('username')
            password = form.cleaned_data.get('password1')
            user = authenticate(username=username, password=password)
            login(request, user)
            return HttpResponse('A new user has been successfully registered!')
    else:
        form = UserCreationForm()
    return render(request, 'register.html', {'form': form})
Let’s understand the code above:
- Line 1 to 4 – we import the class we needed to register a new user.
- Line 7 to 19 – we create a function called sign_up which will handle our user registrations.
- Line 8, we check whether the request method is a post.
- Line 9 – we create an instance UserCreationForm
- Line 10 – we check whether the form is valid.
- Line 11 – we save the data in the form to our User model.
- Line 12 – we get the username from the form.
- Line 13 – we get the password from the form
- Line 14 – we pass the username and password to authenticate method provided to us by Django.
- Line 15 – we log in the user to the system.
- Line 16 – we return an HTTP response to let the user know that the user was created successfully. You can choose to redirect the user to their dashboard at this point.
- Line 17 – we do an else statement just to check if the request is get request.
- Line 18 – we create an empty UserCreationForm instance.
- Line 19 – we render the registration form to the user. We need to create the register.html file in template and make sure it has the following code:
{% extends 'base.html' %}

{% block content %}
    <div class="container">
    <div class="row">
        <br>
        <br>
    </div>
    <div class="row">
        <div class="col-md-6 offset-3">
            <form method="post">
                {% csrf_token %}
              <div class="form-group">
                <label for="exampleInputEmail1">Username</label>
                <input type="text" class="form-control" name="username" aria-describedby="emailHelp" placeholder="Enter username" required>
              </div>
              <div class="form-group">
                <label for="exampleInputPassword1">Password</label>
                <input type="password" class="form-control" name="password1" id="exampleInputPassword1" placeholder="Password" required>
              </div>
                 <div class="form-group">
                <label for="exampleInputPassword1">Confirm Password</label>
                <input type="password" class="form-control" name="password2" id="exampleInputPassword1" placeholder="confirm password" required>
              </div>
              <button type="submit" class="btn btn-primary">Submit</button>
            </form>
        </div>
    </div>
    </div>
{% endblock %}
Let’s understand in this file:
- Line 1 – we extend our base template.
- Line 3 to 30 – we use block content section defined in base.html to create a bootstrap form.
- Line 15 – we capture the username from the user.
- Line 19 – we ask for a password. Notice that the name is password1, UserCreationForm expects this otherwise it will not pass validation.
- Line 23 – we ask user confirm password. Notice that the name is password2, UserCreationForm expects this otherwise it will not pass validation.
The next step is to create urls.py file inside our person_portfolio app. The directory should look like this:

Now make sure that person_portfolio/urls.py file has the following code:
from django.urls import path

from . import views

urlpatterns = [
    path('', views.sign_up, name='user_sign'),
]
Let’s understand the code:
- Line 1 – we import path from django urls module.
- Line 3 – we import our views in person_portfolio app.
- Line 6 – we map our sign-up view to a url.
The next step is to point the root URLconf at the person_portfolio.urls module. In webbasedauth/urls.py add an import for django.urls.include and insert an include() in the urlpatterns list, you file should have this:
"""webbasedauth URL Configuration

The `urlpatterns` list routes URLs to views. For more information please see:
    https://docs.djangoproject.com/en/2.2/topics/http/urls/
Examples:
Function views
    1. Add an import:  from my_app import views
    2. Add a URL to urlpatterns:  path('', views.home, name='home')
Class-based views
    1. Add an import:  from other_app.views import Home
    2. Add a URL to urlpatterns:  path('', Home.as_view(), name='home')
Including another URLconf
    1. Import the include() function: from django.urls import include, path
    2. Add a URL to urlpatterns:  path('blog/', include('blog.urls'))
"""
from django.contrib import admin
from django.urls import path, include

urlpatterns = [
    path('', include('person_portfolio.urls')),
    path('admin/', admin.site.urls),
]
At line 20, we include our urls.py file from person_portfolio. Now make sure that your development server is running by using this command:
python manage.py runserver
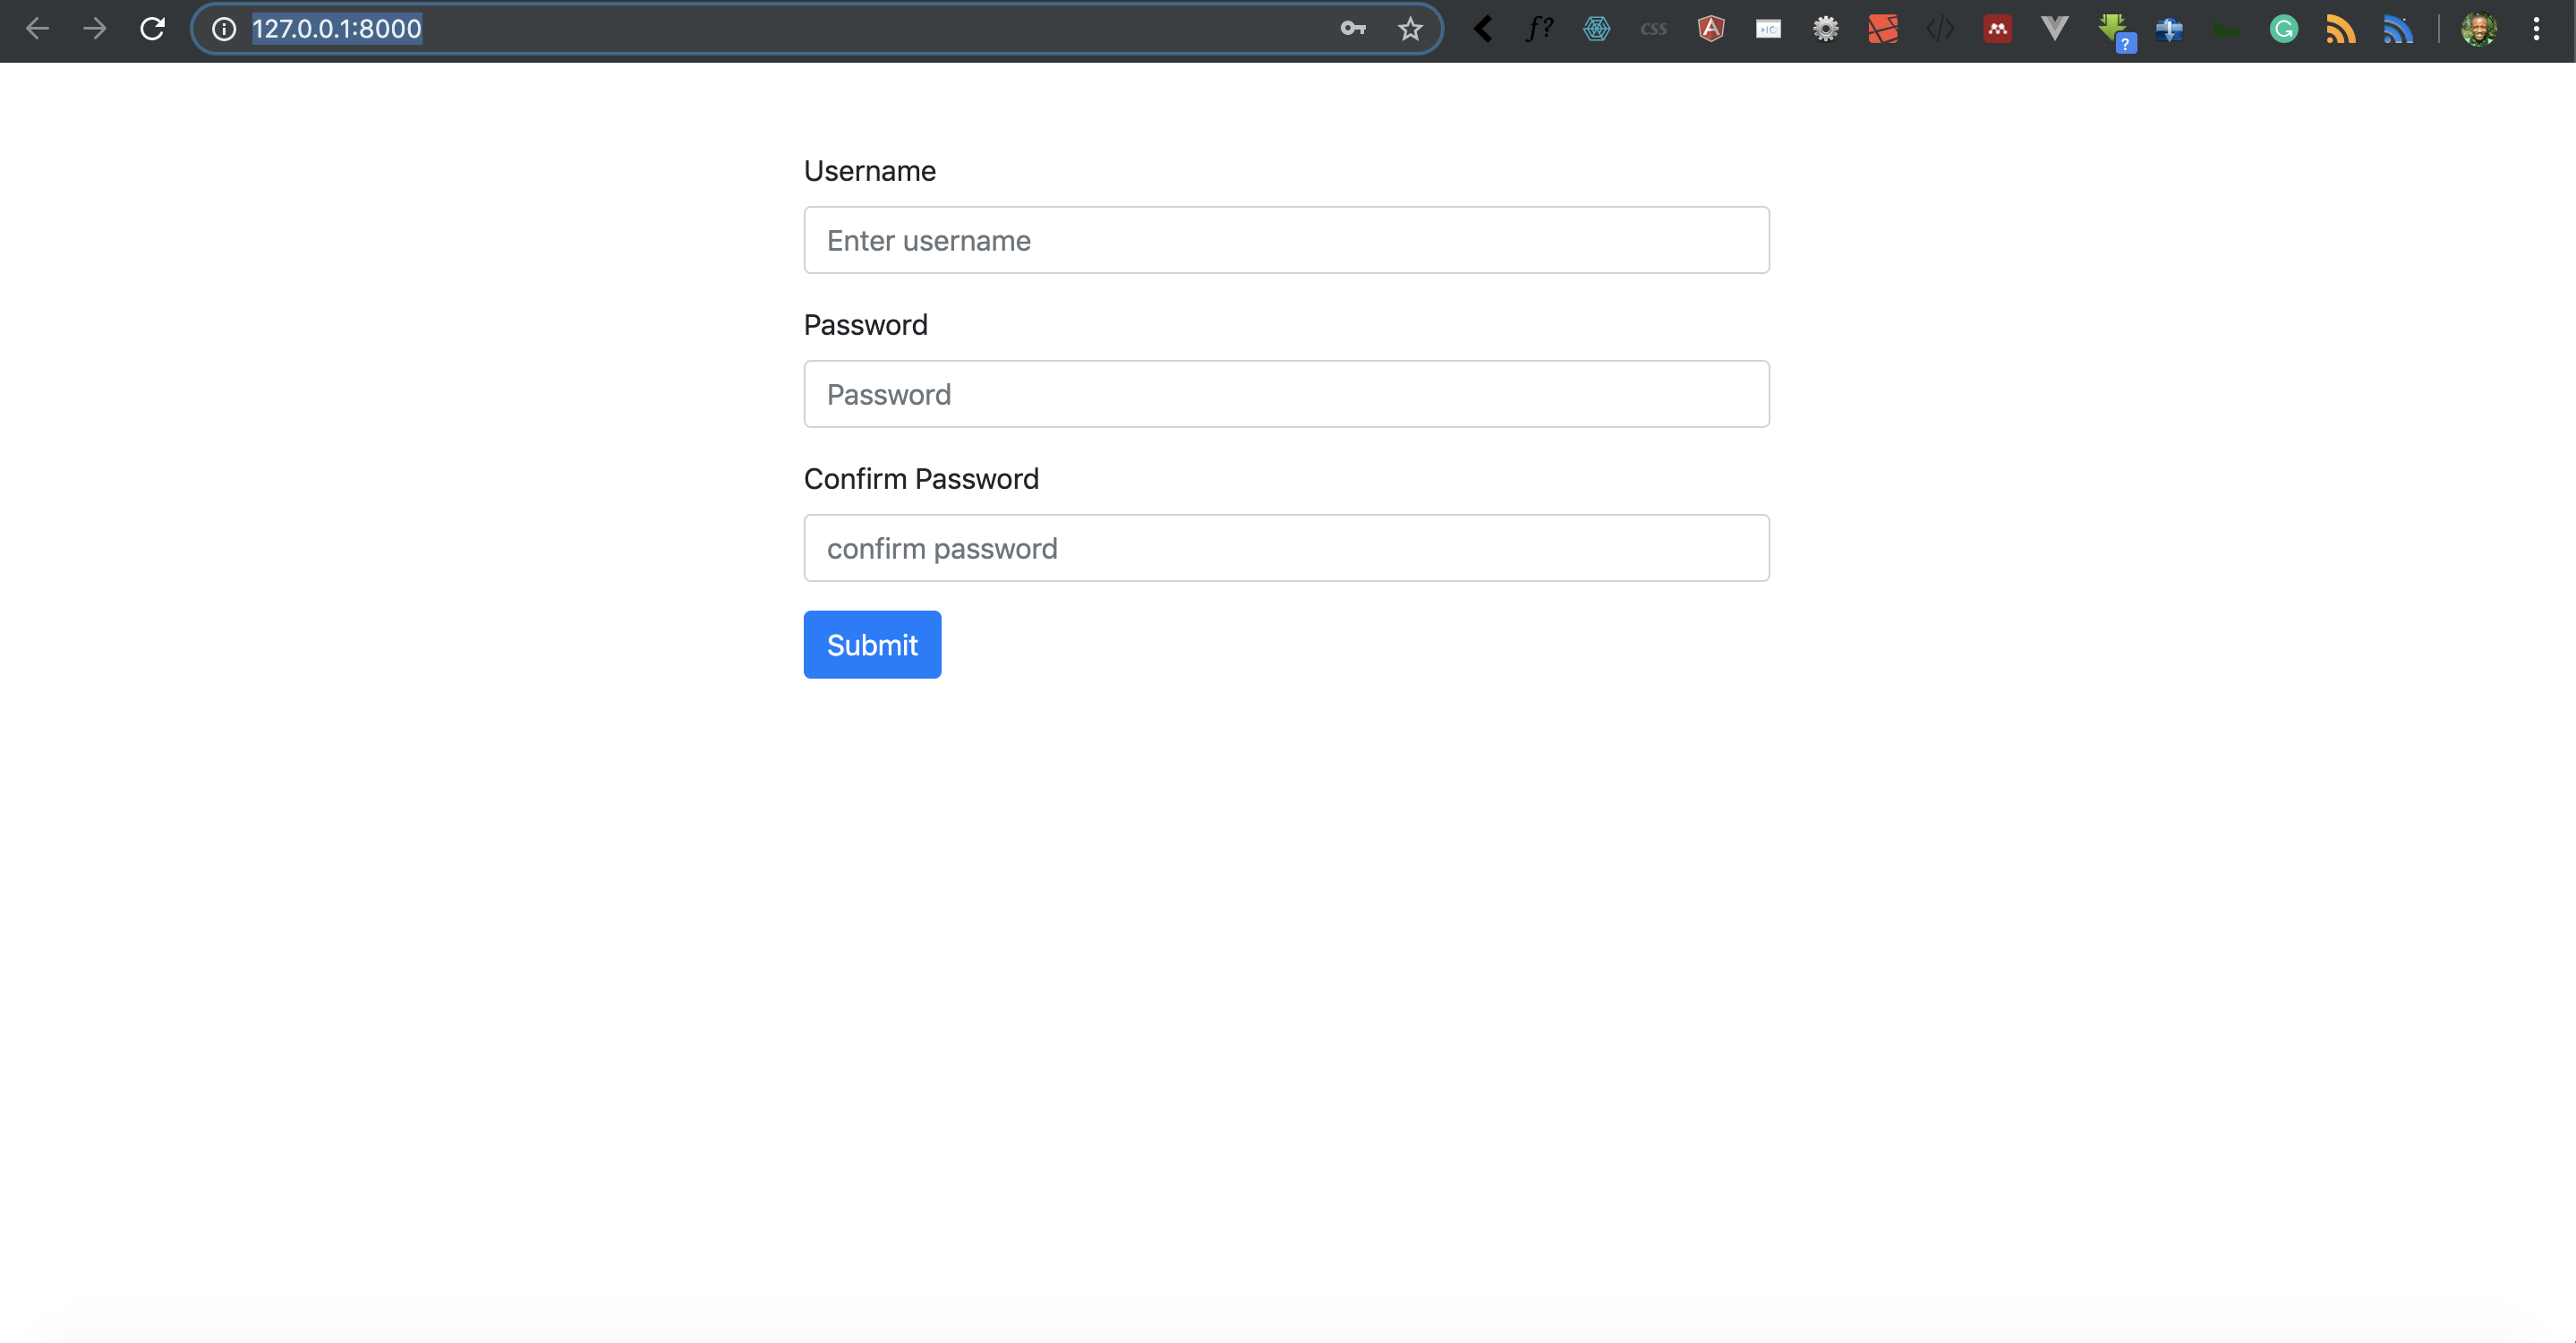
Visit your browser at http://127.0.0.1:8000/ here is the output.

Nice work, go ahead and fill in the form and hit submit button. You should get the following response.

Goal Achieved in this Lesson
- We have learned how to bootstrap framework in Django Application
- We have learned how to create a Django app.
- We have learned how to create templates.
- We have learned how to sign up a new user using Django UserCreationForm.
With that, we conclude this lesson. Get the code of this tutorial series. See you in lesson 3.


Facebook Comments